This is a second version of original FollowBot made in 2015. This one uses Maix Sipeed board with a camera and LCD screen. With 2 micro servo motors I made a small pan-tilt mechanism. Here you can read some more about how I made this project.
I decided to use new Maix Sipeed board, it’s quite powerful, has build in camera and you can program that in python so I though it should be quite easy to make such project with this board. I was right. If you have at least a little bit of experience with Python and electronics you can do some really cool stuff.
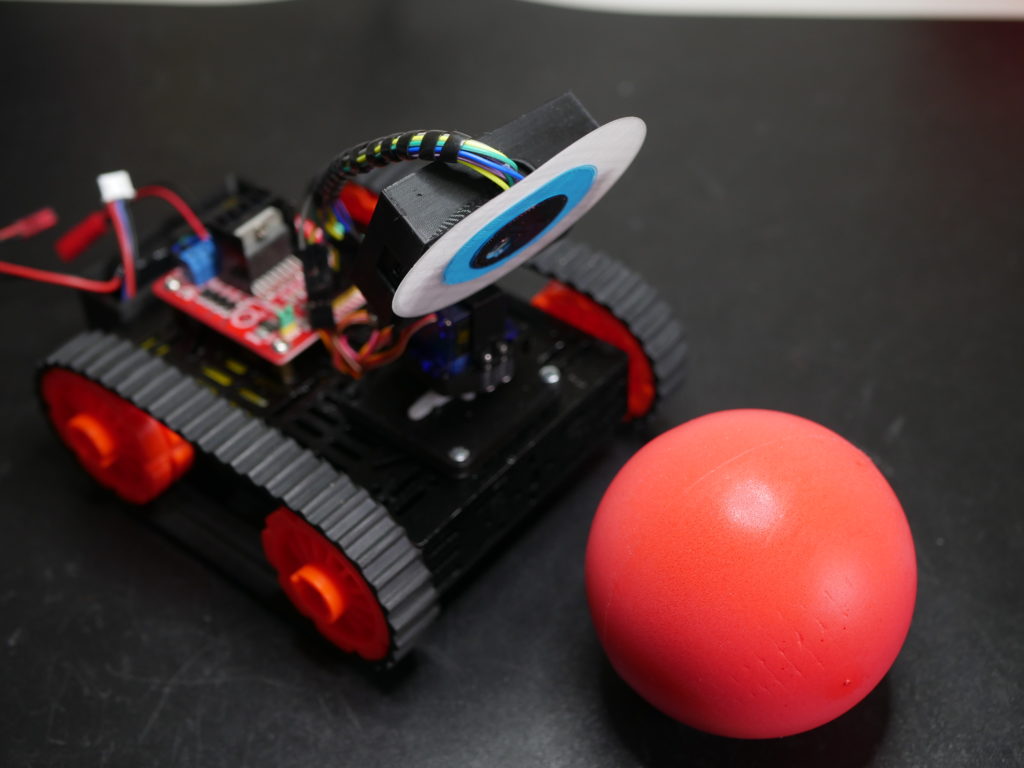
Firstly I had to develop a simple program for tracking red objects. I started by using blob detection algorithm. Basically it searches for all red blobs on the image and store that in a table. Then I had to find the biggest blob as that’s most likely what I want to track (simple for loop with one if statement and one variable can do it). And that’s it, within 40 lines of code you can detect simple single color objects. You can read more about that and find some examples here:
https://maixpy.sipeed.com/en/libs/machine_vision/image.html
https://github.com/sipeed/MaixPy_scripts
Parts
| Part | Link |
| Maix Sipeed | https://bit.ly/31BwNCA |
| Robot Chassis | https://bit.ly/31zBVXK |
| Motor Driver | https://bit.ly/31yPs1V |
| Servo | https://bit.ly/2EqHQ96 |
| Battery | https://bit.ly/3jrPVJr |
There is no servo library for this board so that’s a downside because you need to figure out on your own how to control a servo (later I noticed that there is a servo example on github linked above). Servo is controlled with 50Hz PWM signal, high signal should be between 1 ms – 2 ms so that’s a duty of 5-10% (5% * 1/50s = 1 ms, 10%*1/50s = 2 ms). With a timer I was able to set up such PWM signal, a simple servo example can be found in all of the files (you can download them at the bottom of the page).
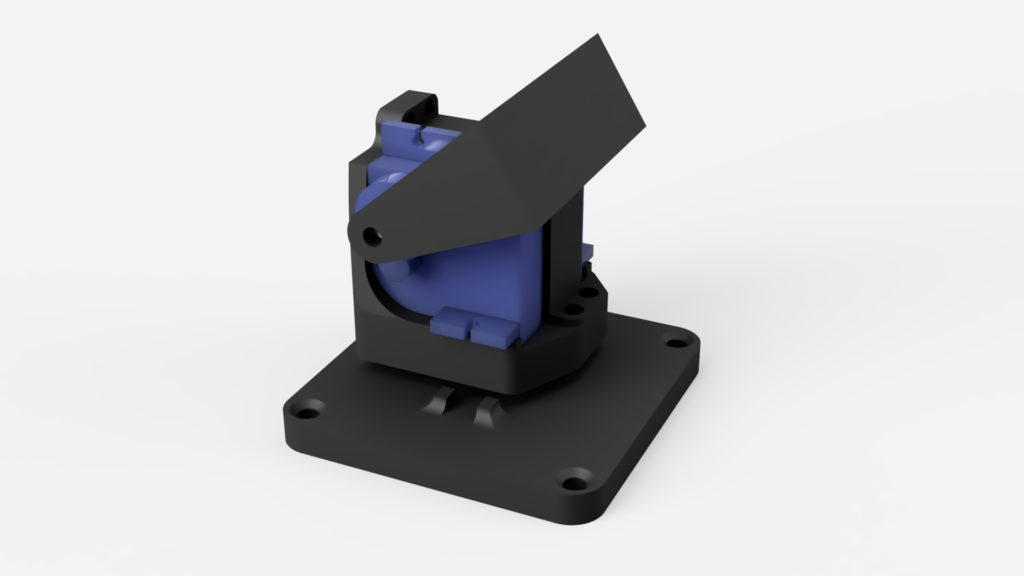
I also designed my own minimal pan and tilt mechanism in Fusion360. STL files are also at the bottom of this page.
I made my own functions to control DC motor driver but that was obviously very easy. Here is how I connected the motor driver and servos to the board.
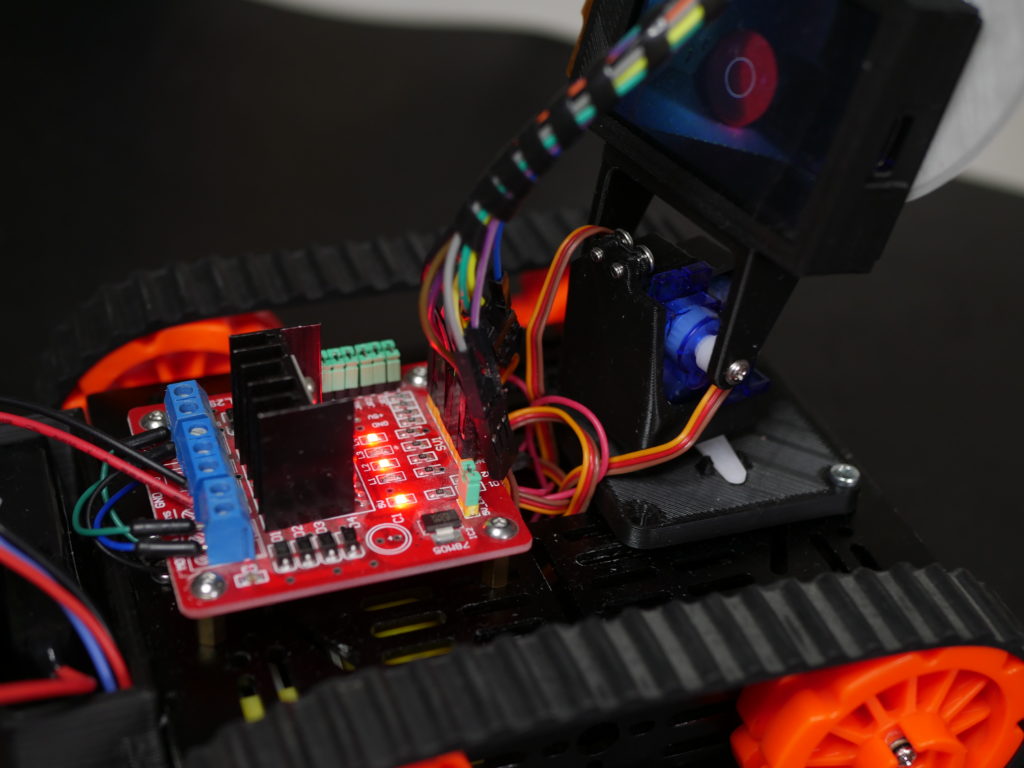
Connection
| Maix Sipeed | DC Motor Driver/Servo |
| PIN 0 | Pan Servo Signal |
| PIN 1 | Tilt Servo Signal |
| PIN 9 | Motor Driver ENA |
| PIN 10 | Motor Driver IN1 |
| PIN 11 | Motor Driver IN2 |
| PIN 12 | Motor Driver IN3 |
| PIN 13 | Motor Driver IN4 |
| PIN 14 | Motor Driver ENB |
| GND | Motor Driver and Servo GND |
| 5V | Motor Driver and Servo 5V |
After that I simply connected all small programs that I wrote and put everything on my robot chassis. And it was time for the final test that you can see on the video below.
Here you can find a ZIP archive with all the files including my small subprograms, main followbot.py and all STL files that you can print. Feel free to edit those and customize this project to make it work for you. Don’t forget to share your work with others and link to my project 🙂
Thanks for reading this short project description, it’s definitely not a full tutorial but I hope it will be helpful for some of you!