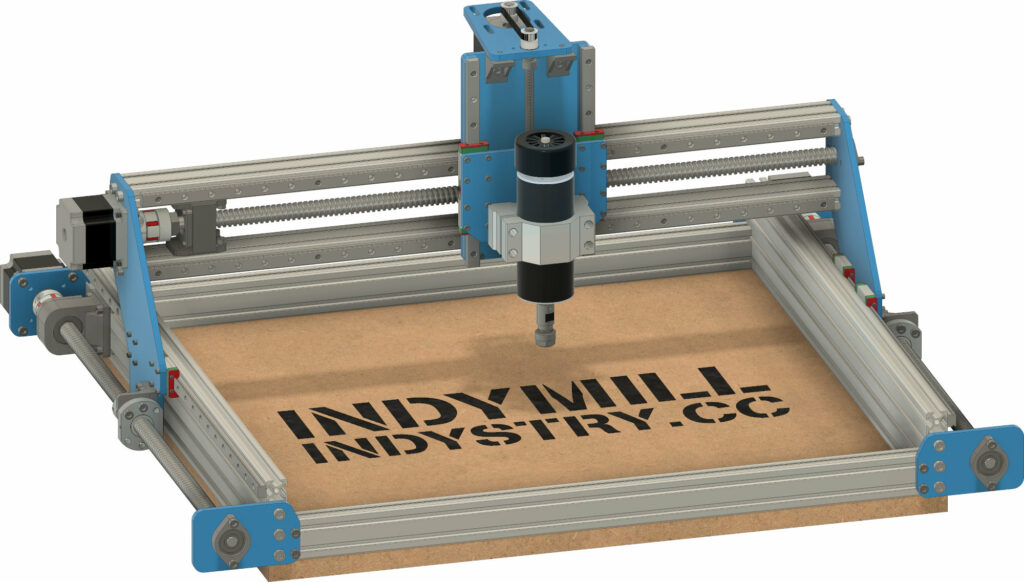
IndyMill is an open-source CNC machine project developed by Nikodem Bartnik as an upgrade to the Dremel CNC. The goal is to create a DIY CNC machine that is easy to build and replicate worldwide. By using widely available components and providing comprehensive documentation, IndyMill ensures accessibility for makers of all skill levels. High-quality design and detailed instructions go hand in hand to make this project truly outstanding. Below, you’ll find an up-to-date list of videos, images, files, and a complete parts list. Don’t forget to subscribe to the newsletter to stay informed about the latest updates!
Parts list for a DIY CNC Machine – IndyMill
Below you can find tables with all the parts that I used to build IndyMill. The table is divided into mechanics and electronics if you prefer an excel sheet that you can easily print, export, and open on your computer you can find it here:
Excel sheet – IndyMill Parts
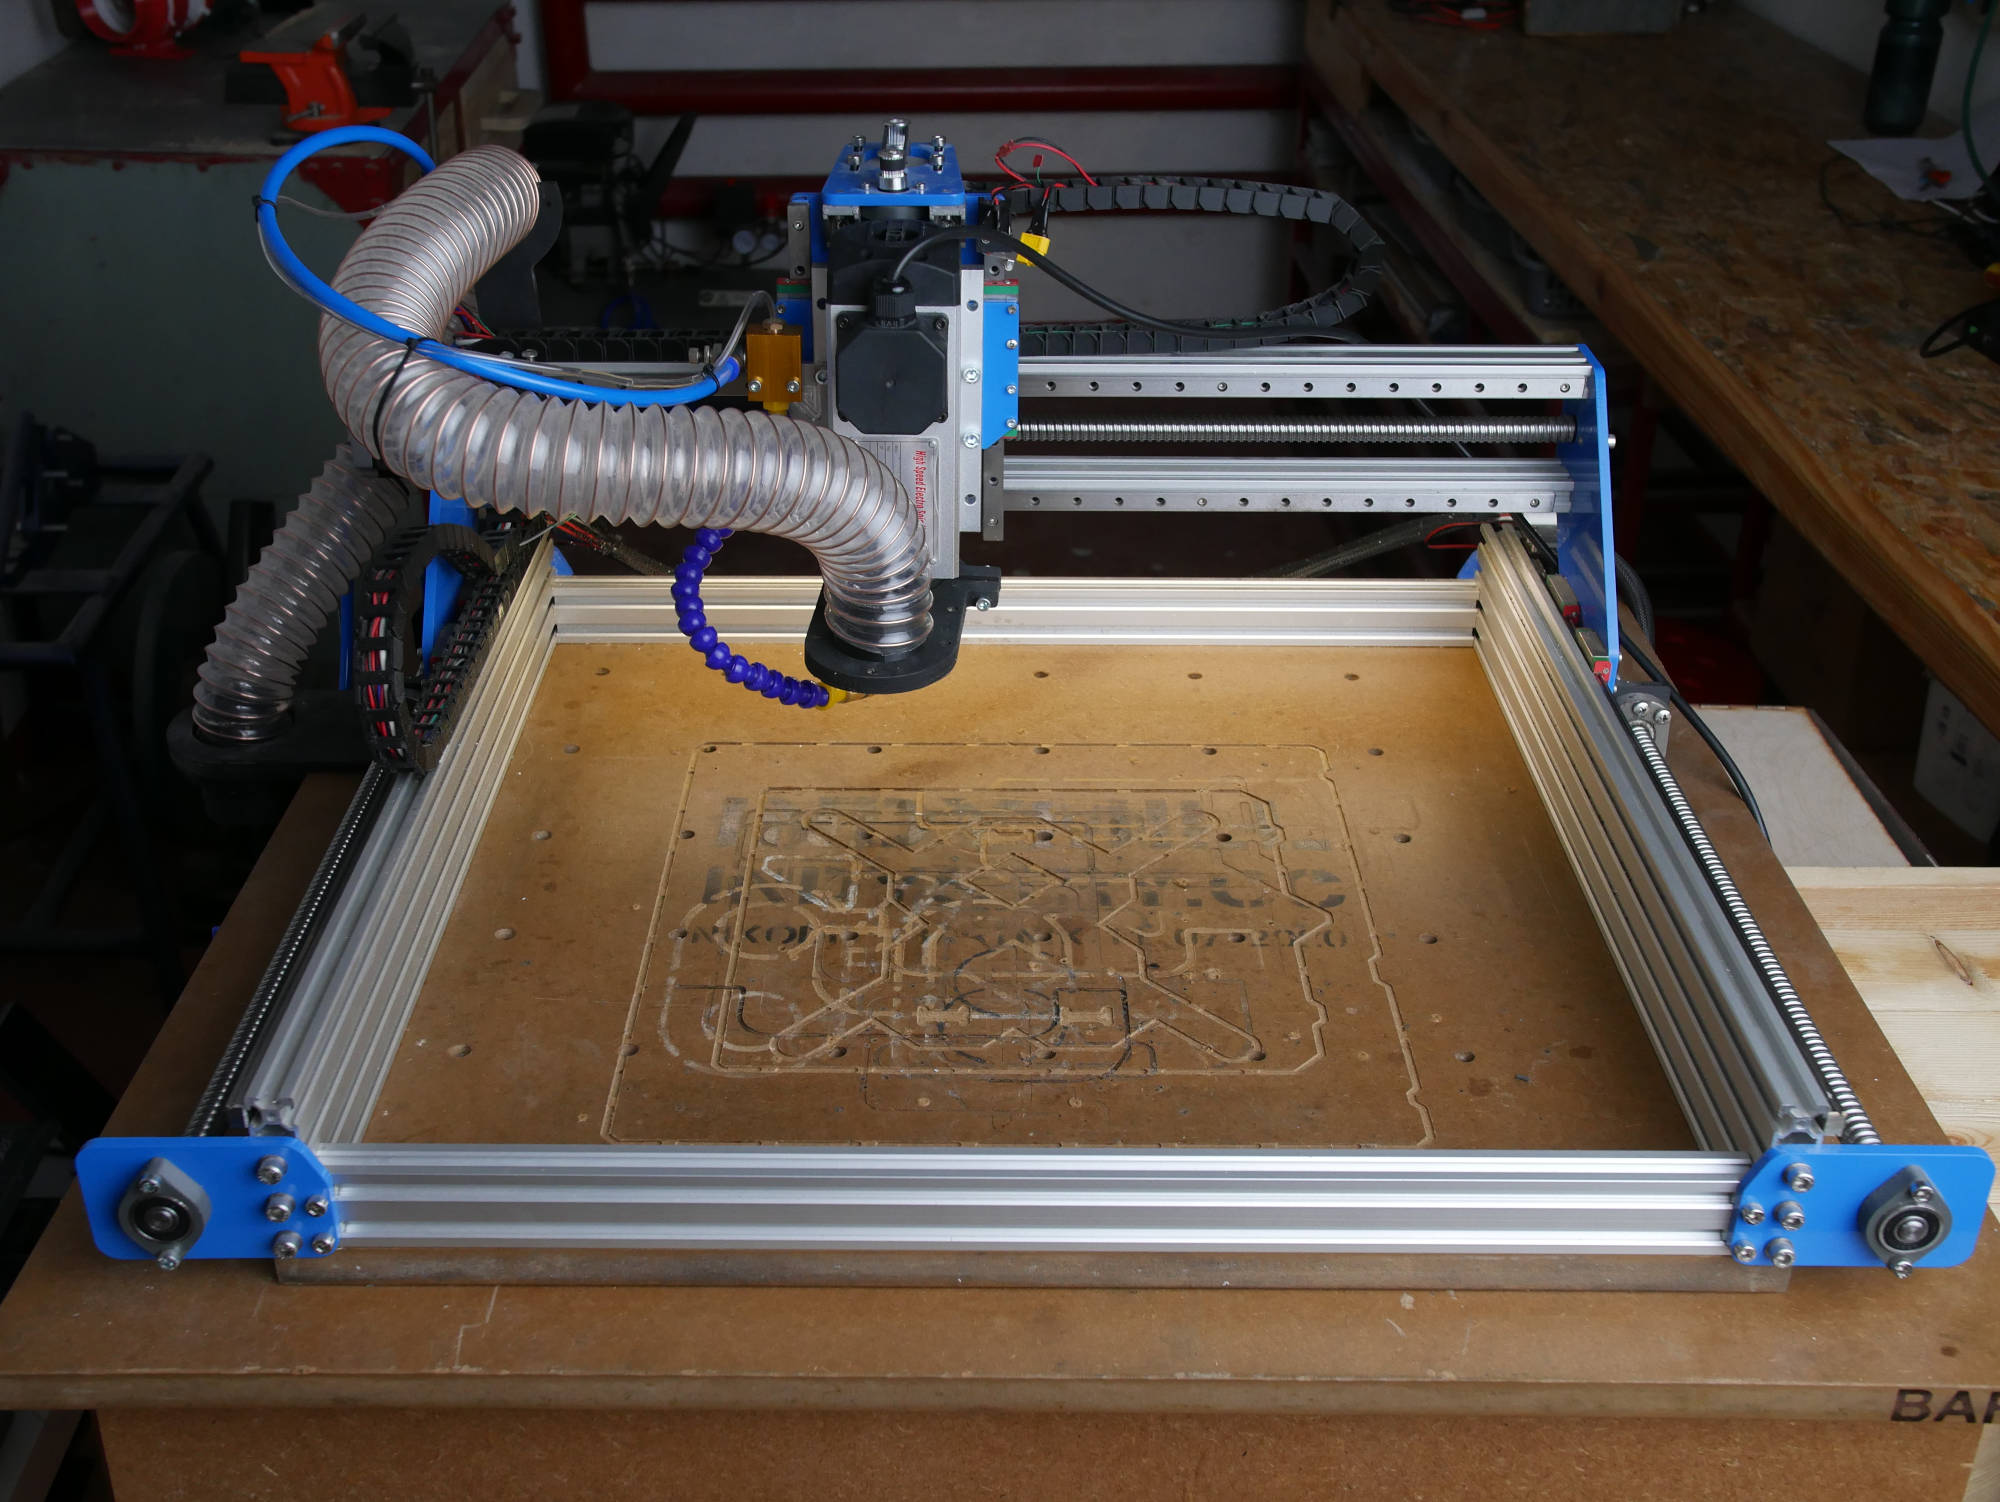
IndyMill build based on this parts list has a working area of about 520x400x115mm. The outside dimensions are 760x660x360mm. Of course by using longer profiles, linear rails and ballscrews you can build it bigger.
Some of the parts required to build IndyMill can be purchased in my store. It turned out to be a great way to simplify building the machine for everyone and support the development of future projects. Thanks to ordering in bigger batches I am able to offer parts at a lower price than it would cost for you to order a laser-cutting service.
-
 IndyMill 3D Printed Parts$59,00
 -
 IndyMill Bare Steel Plates Kit$149,00
 -
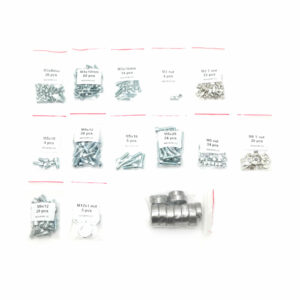 IndyMill Screws & Bearings$59,00
 -
 IndyShield – CNC Arduino Shield$15,00
 -
 IndyMill Steel Plates Kit$199,00
Mechanics you need to build a DIY CNC machine/router
Electronics required to build your own CNC machine
| Name | Quantity | Aliexpress | Amazon |
| Nema23 Stepper Motor | 4 | https://s.click.aliexpress.com/e/_oFyBKqZ | https://amzn.to/4iwPUCx |
| IndyShield | 1 | – | – |
| DM542 Stepper Drivers | 4 | https://s.click.aliexpress.com/e/_oBITBD7 | https://amzn.to/4hd1G3T |
| Arduino UNO | 1 | https://s.click.aliexpress.com/e/_olCso1P | https://amzn.to/4hkQVwA |
| Power Supply 36V 16.6A | 1 | https://s.click.aliexpress.com/e/_oBxYo73 | https://amzn.to/4kTmKzc |
| AC Socket | 1 | https://s.click.aliexpress.com/e/_okxEky5 | https://amzn.to/3mveo5k |
| Cables | – | https://s.click.aliexpress.com/e/_omJy9a9 | https://amzn.to/3Jzmz97 |
| 4 pin Connectors | 4 | https://s.click.aliexpress.com/e/_ooYDLJJ | https://amzn.to/3zm0OVw |
| 500W Spindle | 1 | https://s.click.aliexpress.com/e/_ophLtqN | https://amzn.to/4bUk408 |
| 1.5kW Spindle | 1 | https://s.click.aliexpress.com/e/_okCecnF | https://amzn.to/4bUk408 |
| Inverter for 1.5kW Spindle | 1 | https://s.click.aliexpress.com/e/_okCecnF | https://amzn.to/4bUk408 |
Build instructions for IndyMill CNC Machine
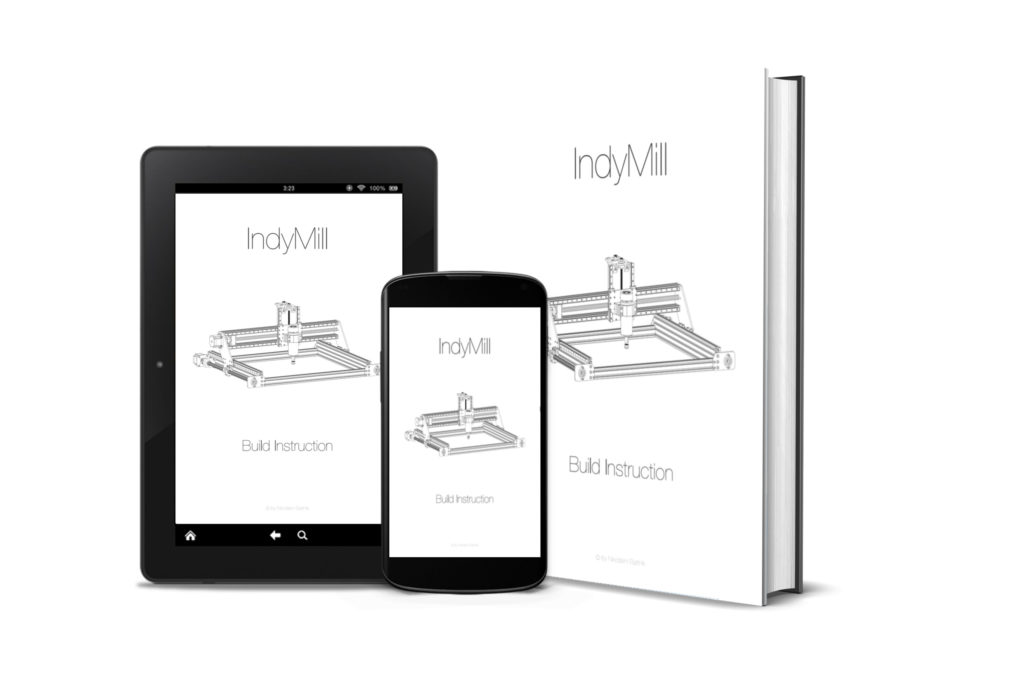
The above parts list and files down below are everything that you need to build the IndyMill. It’s open-source so you don’t have to pay anything for the files or design. But I thought that I will make detailed instructions so that it would be easier for some of you to assemble this project and at the same time support my work. It’s 40 pages long, there are over 60 drawings and a lot of useful information on the assembly process. It’s a PDF file so you can put it on your computer, smartphone, tablet, or even print. And it’s only $10. Let me say it again, you don’t need it to build this project, but if you want to simplify the assembly process and support my work at the same time, you can get the instructions here:
Buy onDXF and STL Files for a DIY CNC Machine – IndyMill
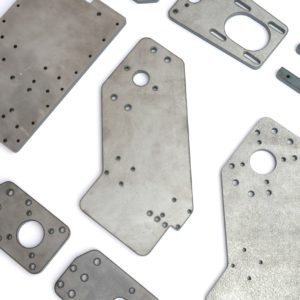
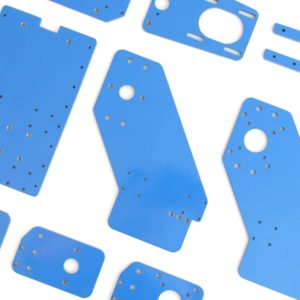
Below you can download the DXF files needed to build IndyMill – DIY CNC Machine, you can use those files to order laser cutting of the parts. Those should be cut out of 6 mm steel or aluminum (and just two small parts cut out of 8mm steel or aluminum, see the table below).
If you are going to order or manufacture that on your own just simply send those files to a company with a laser cutter that is able to cut steel. Make sure that they can cut all of the holes. You need every file cut only once. All DXF files are in mm.
I am also selling a kit of steel plates for IndyMill. The kit is powder coated with RAL5019 and I manually tap all the holes so the kit is ready for assembly out of the box. Also unpainted and untapped bare steel kit is available. If you have any questions regarding the kits please let me know!
-
IndyMill Bare Steel Plates Kit$149,00
-
IndyMill Steel Plates Kit$199,00
| Name | Quantity | Material Thickness |
| 500W Spindle Plate.dxf | 1 | 6 mm |
| Motor Support Left.dxf | 1 | 6 mm |
| Motor Support Right.dxf | 1 | 6 mm |
| Screw Support Left.dxf | 1 | 6 mm |
| Screw Support Right.dxf | 1 | 6 mm |
| X Axis.dxf | 1 | 6 mm |
| Y Axis Left.dxf | 1 | 6 mm |
| Y Axis Right.dxf | 1 | 6 mm |
| Z Axis Motor Support.dxf | 1 | 6 mm |
| Z Axis Rail Support1.dxf | 1 | 8 mm |
| Z Axis Rail Support2.dxf | 1 | 8 mm |
You will also need some 3D printed parts to build this DIY CNC project, you can find all STL files in the ZIP archive below. Settings I use to print them: 40% infill, 3 perimeters, 0.3 mm layer height (with 0.6 mm nozzle).
| Part Name | Quantity |
| 6000 holder.stl | 3 |
| Ball screw block X axis flap.stl | 1 |
| Ball screw block X axis.stl | 1 |
| Ball screw block Y axis flap.stl | 2 |
| Ball screw block Y axis.stl | 2 |
| X axis nut holder.stl | 1 |
| Y axis nut holder left.stl | 1 |
| Y axis nut holder right.stl | 1 |
| Z axis bearing holder.stl | 1 |
| Z axis nut holder.stl | 1 |
If you don’t have a 3D printer and there is no way for you to print the parts you can order those from my store as well:
-
IndyMill 3D Printed Parts$59,00
Videos about DIY CNC Machine project – IndyMill
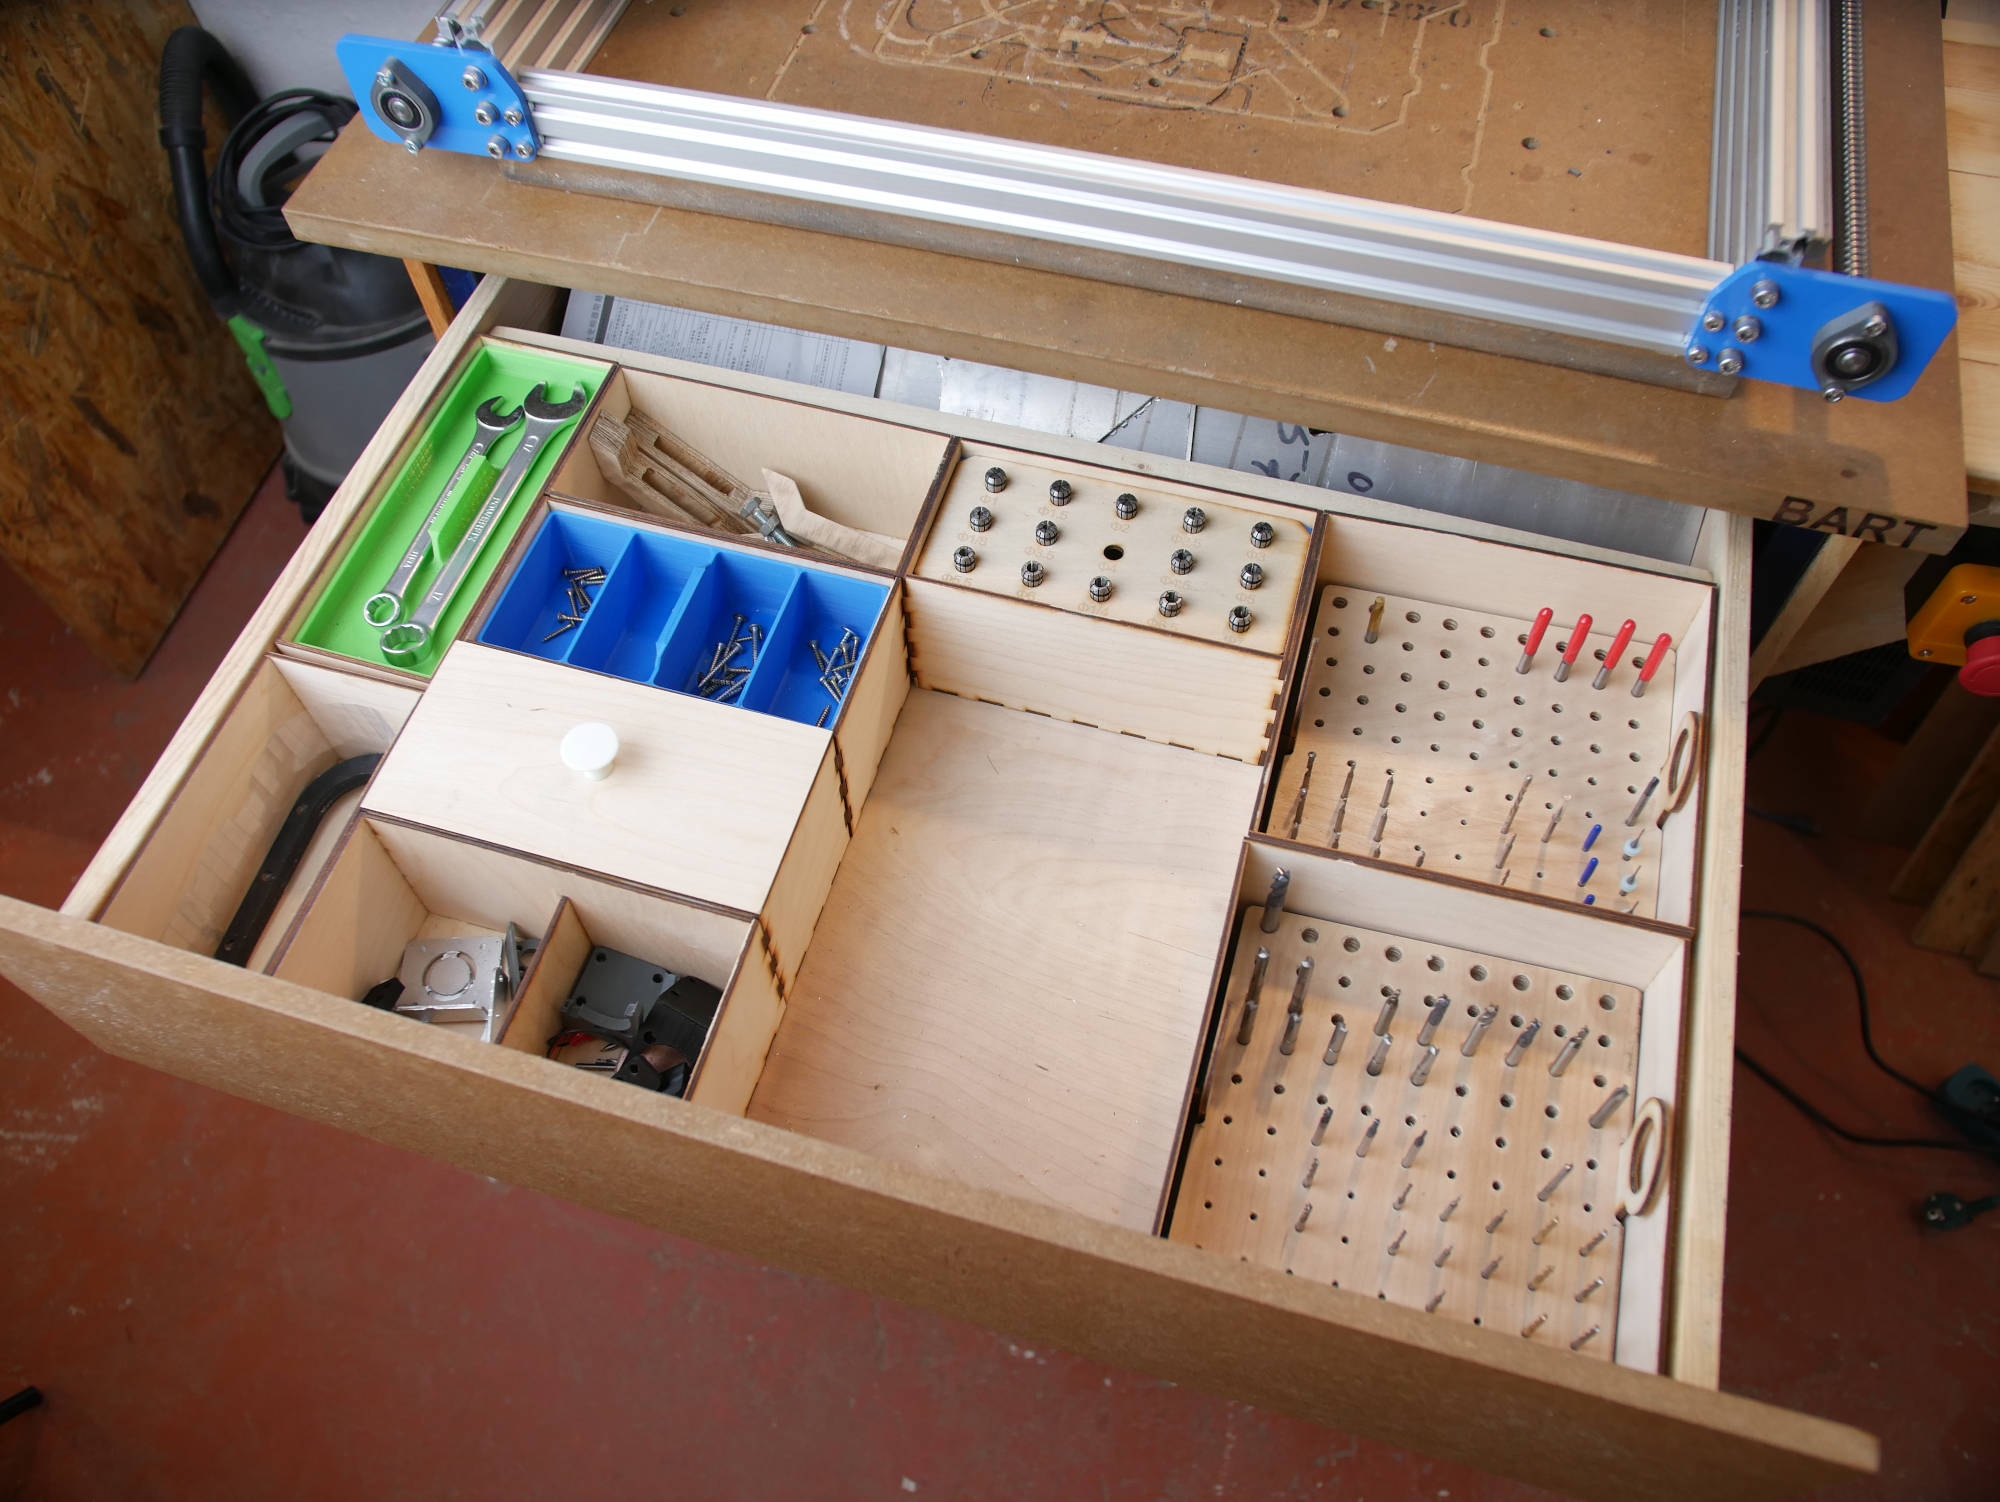
Here are all the videos that I made about my DIY CNC IndyMill (plus updates below). I highly advise watching all of them before starting to build one. There is a lot of useful information in each one of them and the step-by-step assembly process is shown. Also, you can take a closer look at fails, design process, and some problem-solving 🙂 If you are curious how to properly use your DIY CNC machine after building it it is shown in some IndyMill videos but also my projects videos where I use it to build cool stuff! I even made some projects/videos showing how to organize your CNC Machine, how to build a table and a clean storage solution for all the CNC bits and accessories.
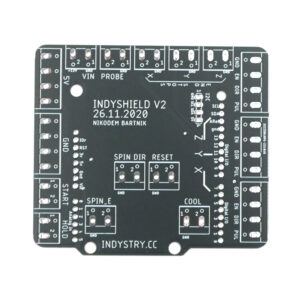
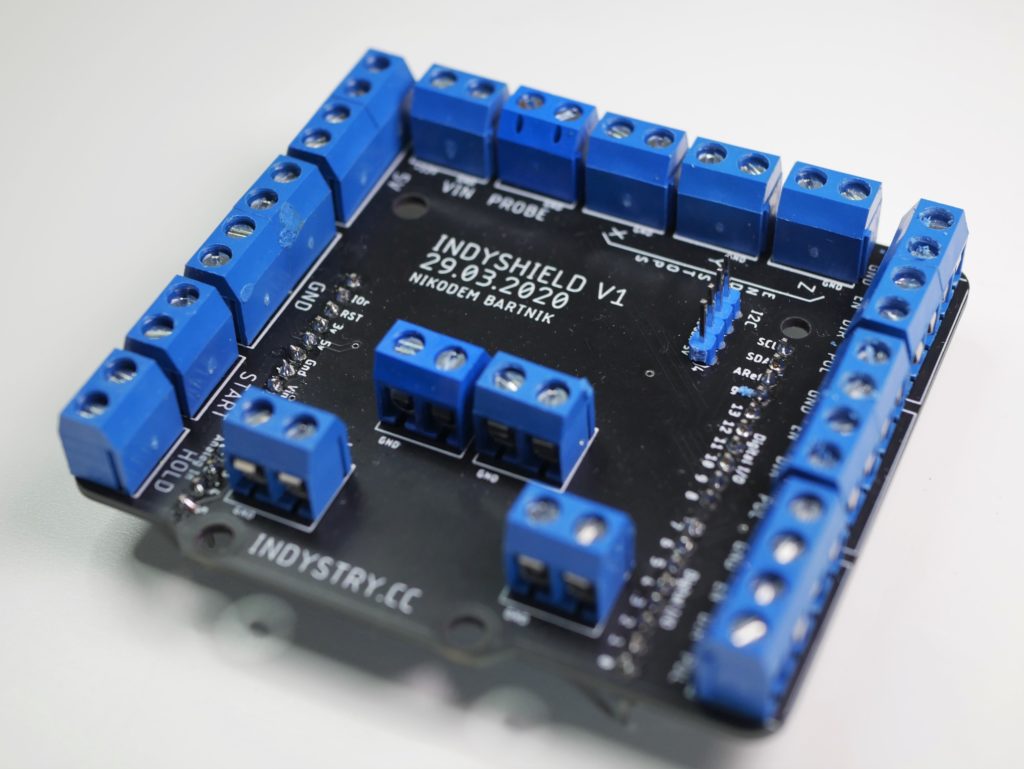
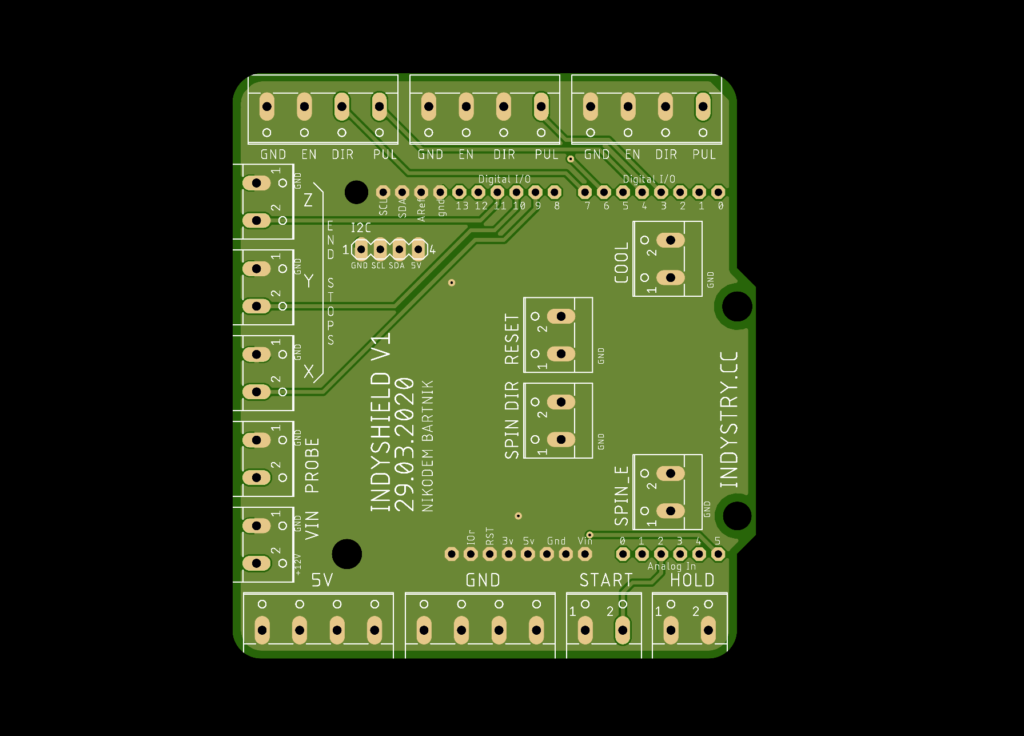
IndyShield – Arduino UNO shield compatible with GRBL
IndyShield is an Arduino UNO based GRBL shield with screw terminals to simplify electronics connection in your CNC router. It’s designed to work with GRBL so you can easily use it not only for IndyMill but actually for any other DIY CNC machine that you want to build. You can download the PCB design below and if you want to buy it check out my store:
Of course, because my project is open source below you can find a ZIP archive with all the design files of IndyShield (designed in Eagle). Feel free to modify it and share it with others just remember to put a link to my project 🙂
If you want to support my projects (It would be highly appreciated!) You can do it through Patreon (link below). You can also support me through PayPal!
Upgrades I made to a DIY CNC Machine – IndyMill
I decided to add limit switches, z probe, an emergency button, an LED light, and a threaded waste board as I thought those updates were the most useful for me. I am working on a clamping system for that waste board and dust shoe (I want to create a very universal and easy-to-make dust shoe for a 500W spindle). The limit switches holder STL file can be found in the ZIP archive with all STL files in the files section above. Here you have links to some of the things I used for upgrades:
| Name | Quantity | Banggood | Aliexpress | Amazon |
| Limit switches | 3 | https://bit.ly/368SJHr | https://bit.ly/3fEjhDu | https://amzn.to/3oODmgl |
| Emergency Button | 1 | https://bit.ly/39fvbmi | https://bit.ly/2VeLozH | https://amzn.to/3oORy8S |
| LED Strip | 0.5 m | https://bit.ly/3mdu620 | https://bit.ly/3lapRTC | https://amzn.to/3pbzNBd |
| M8 Knock In nuts | 30-50 | https://bit.ly/368rL2K | https://bit.ly/2JnrIqE | https://amzn.to/3rNrZqW |
DIY ball screw covers for a CNC
I made very simple DIY telescopic ball screw covers out of PVC to protect the screws and keep everything working fine for a long time. Below you can see my video where I explained how I made that and you can also find right the ZIP archive with all STL files needed to add this update to your IndyMill! It was an interesting concept but after a few months, I had to remove the covers as they introduced a lot of friction and reduced the working area of my CNC machine. There is some potential in this approach but a different material would have to be used instead of PVC.
500W CNC Spindle Dust Shoe
I designed and made my own universal version of a dust shoe for a 500W spindle (a really popular Chinese spindle). It is very simple to make and work really well. You can find more info about my dust shoe in the video below. You can also download free files that you can use to make it on your own (those files are also on my GitHub).
1.5kW CNC Spindle, new dust shoe, computer table, spindle light, and more
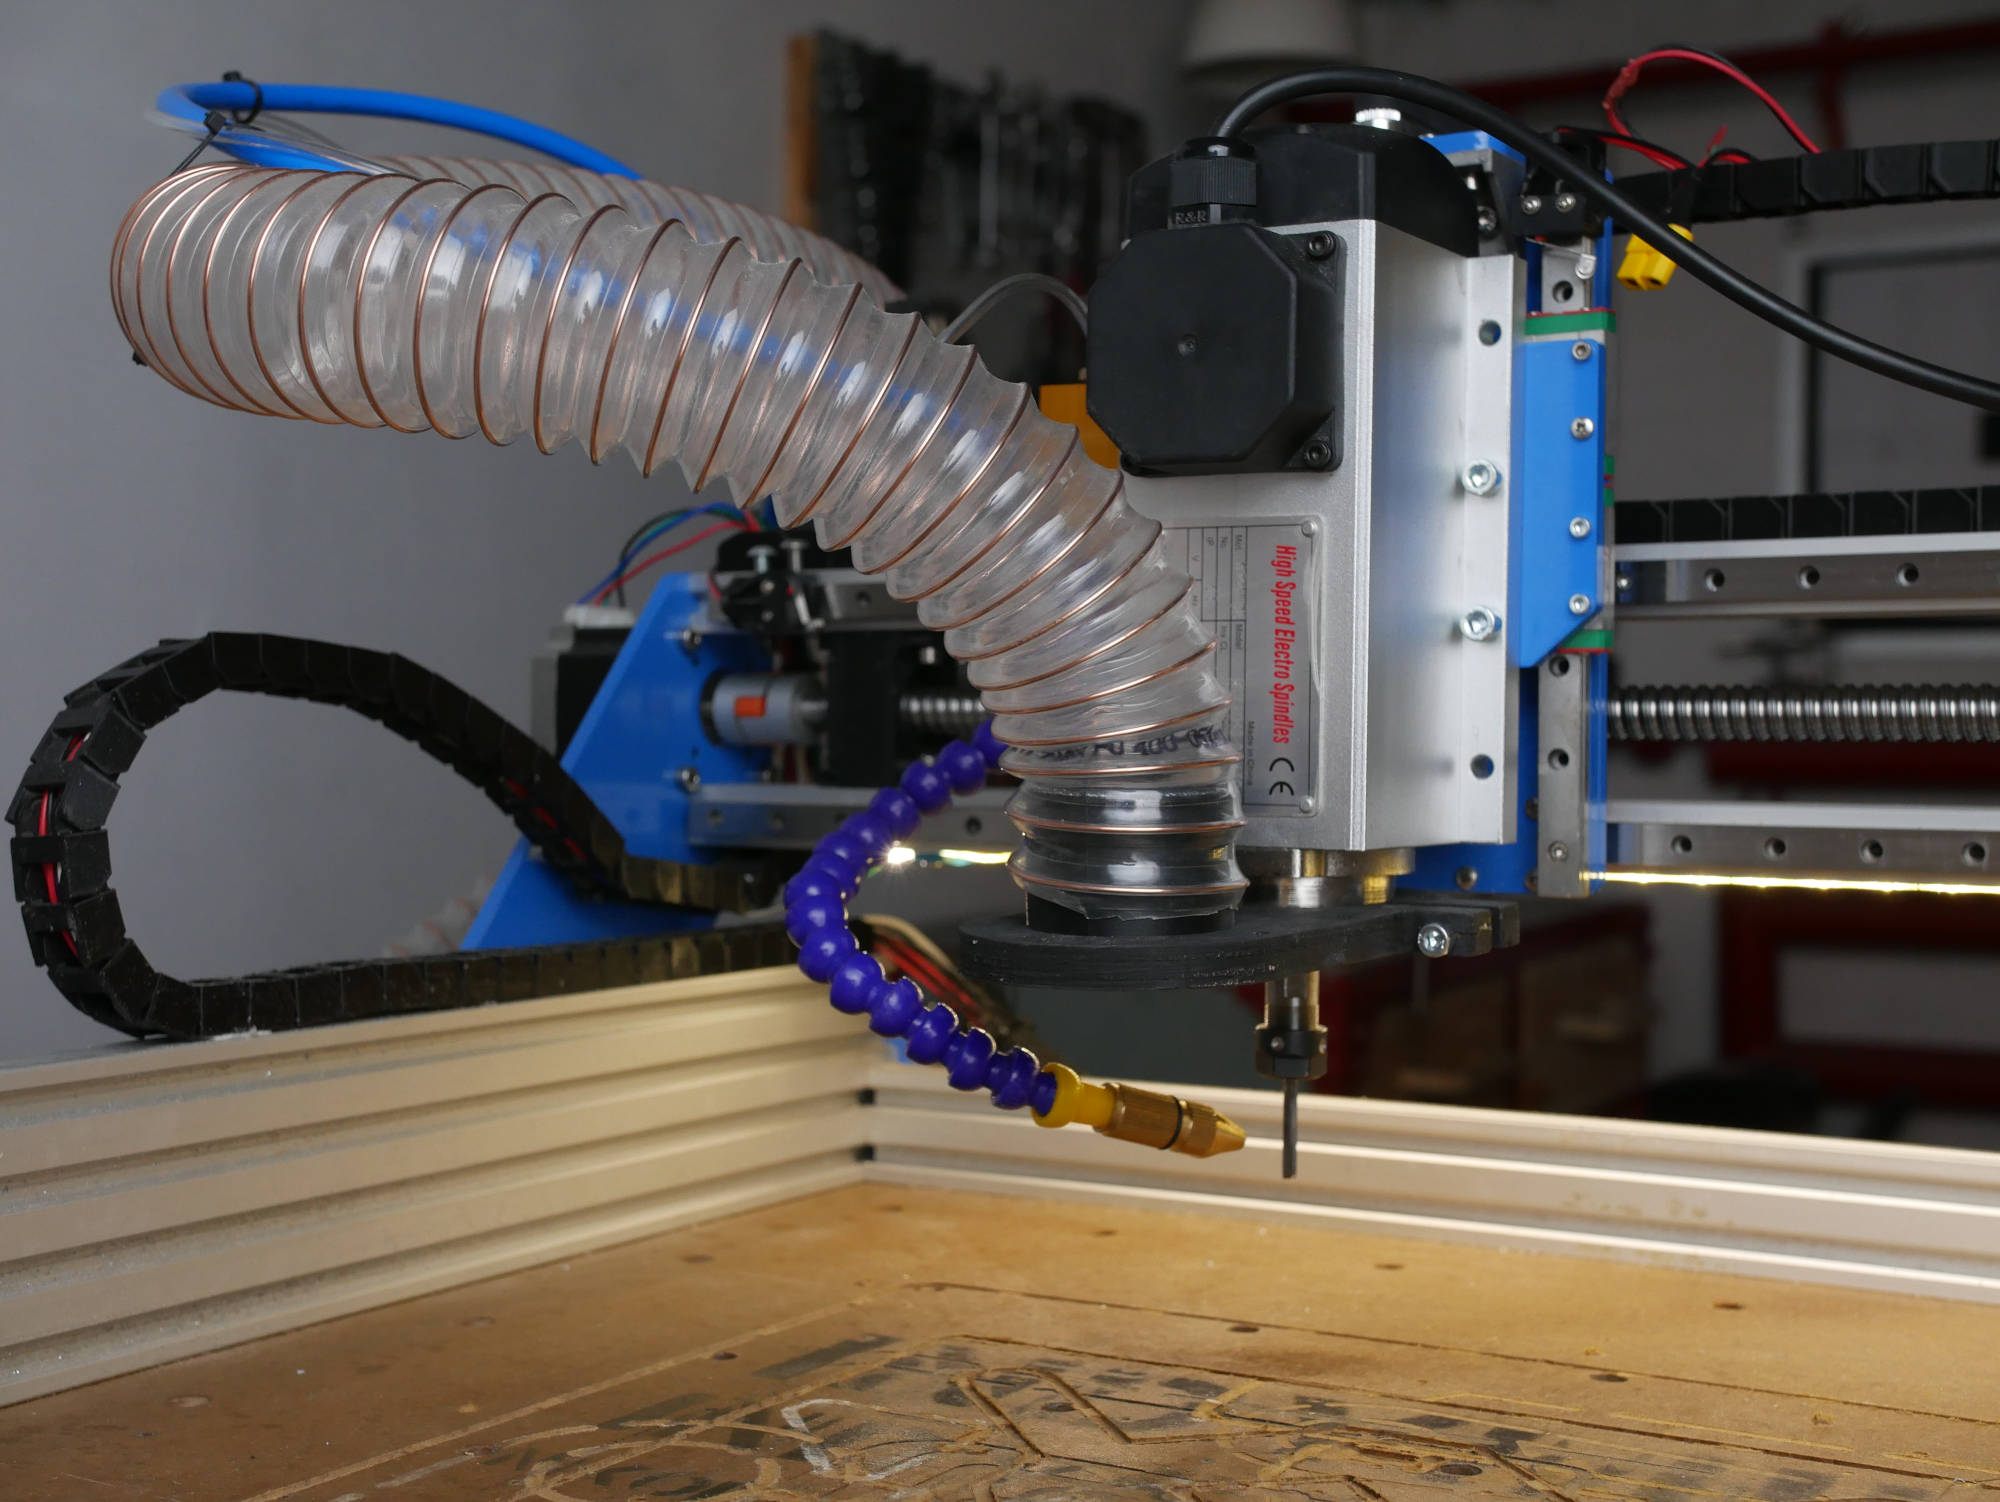
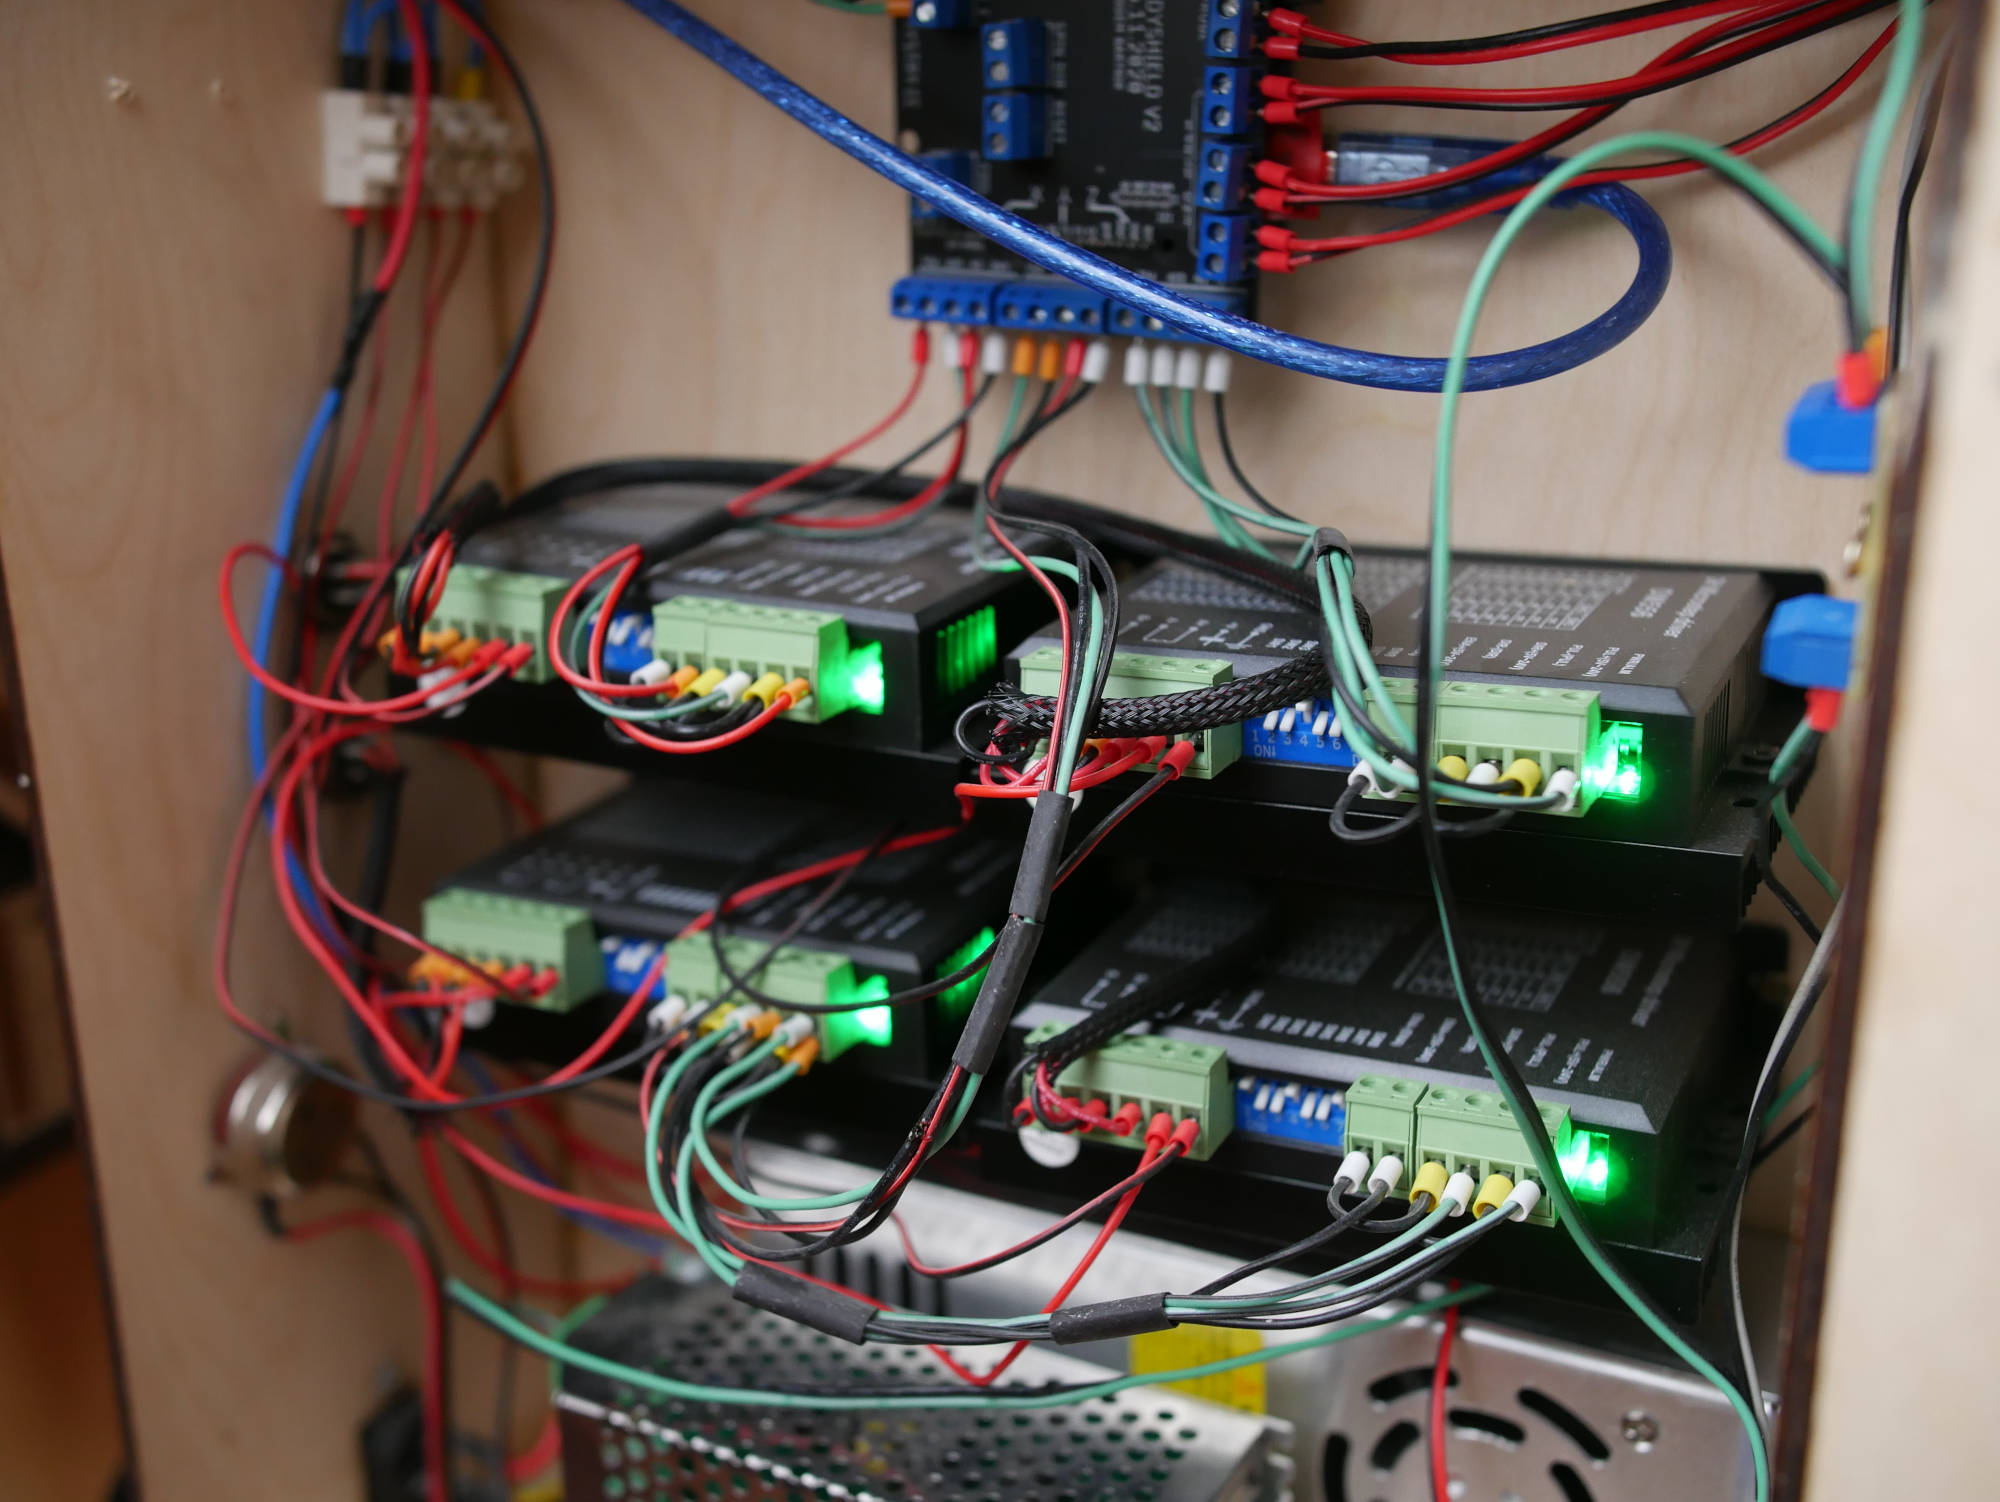
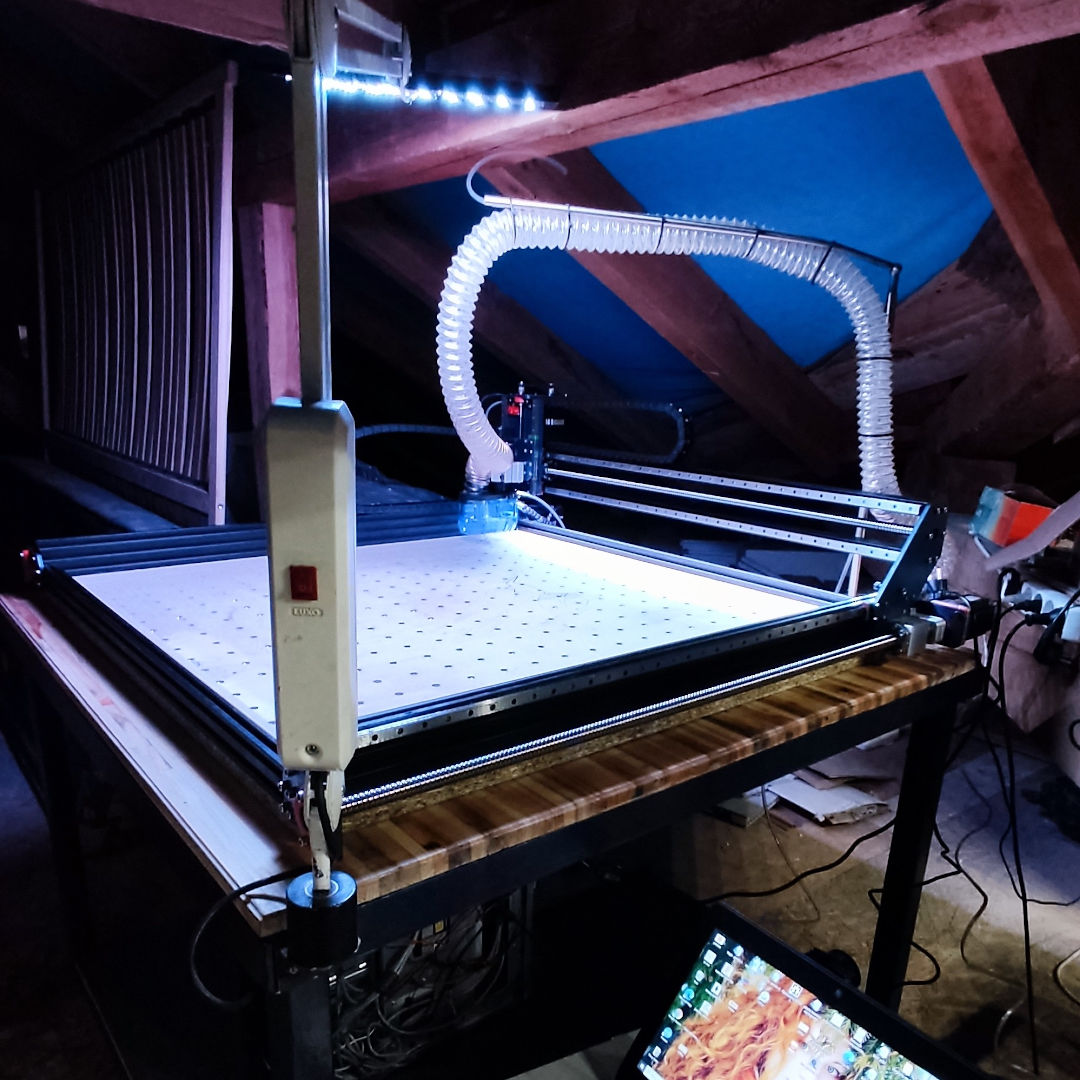
I added plenty of upgrades to IndyMill including a new huge and powerful spindle a 1.5kW beast that makes it just soooo easy to machine aluminum. Because I changed the spindle I also had to redesign the dust shoe, the concept is basically the same but I made it a bit bigger. I also added some upgrades to the 500W CNC spindle, spindle light – simple PCB with LEDs that you can directly attach to the spindle and have even more light while machining and the other upgrade was a simple circuit to control the 500W spindle with GRBL. This one has to go through some more tests but should already work properly.
Maybe not so visible but an incredibly important upgrade was replacing the 12V power supply with 36V and right after that replacing TB6600 drivers with DM556. This is very important as TB6600 can’t handle 36V. If you are building your CNC from scratch I advise you to start the build with 24V or 36V power supply and DM556. It’s not that expensive to build and the performance improvement is definitely worth it!
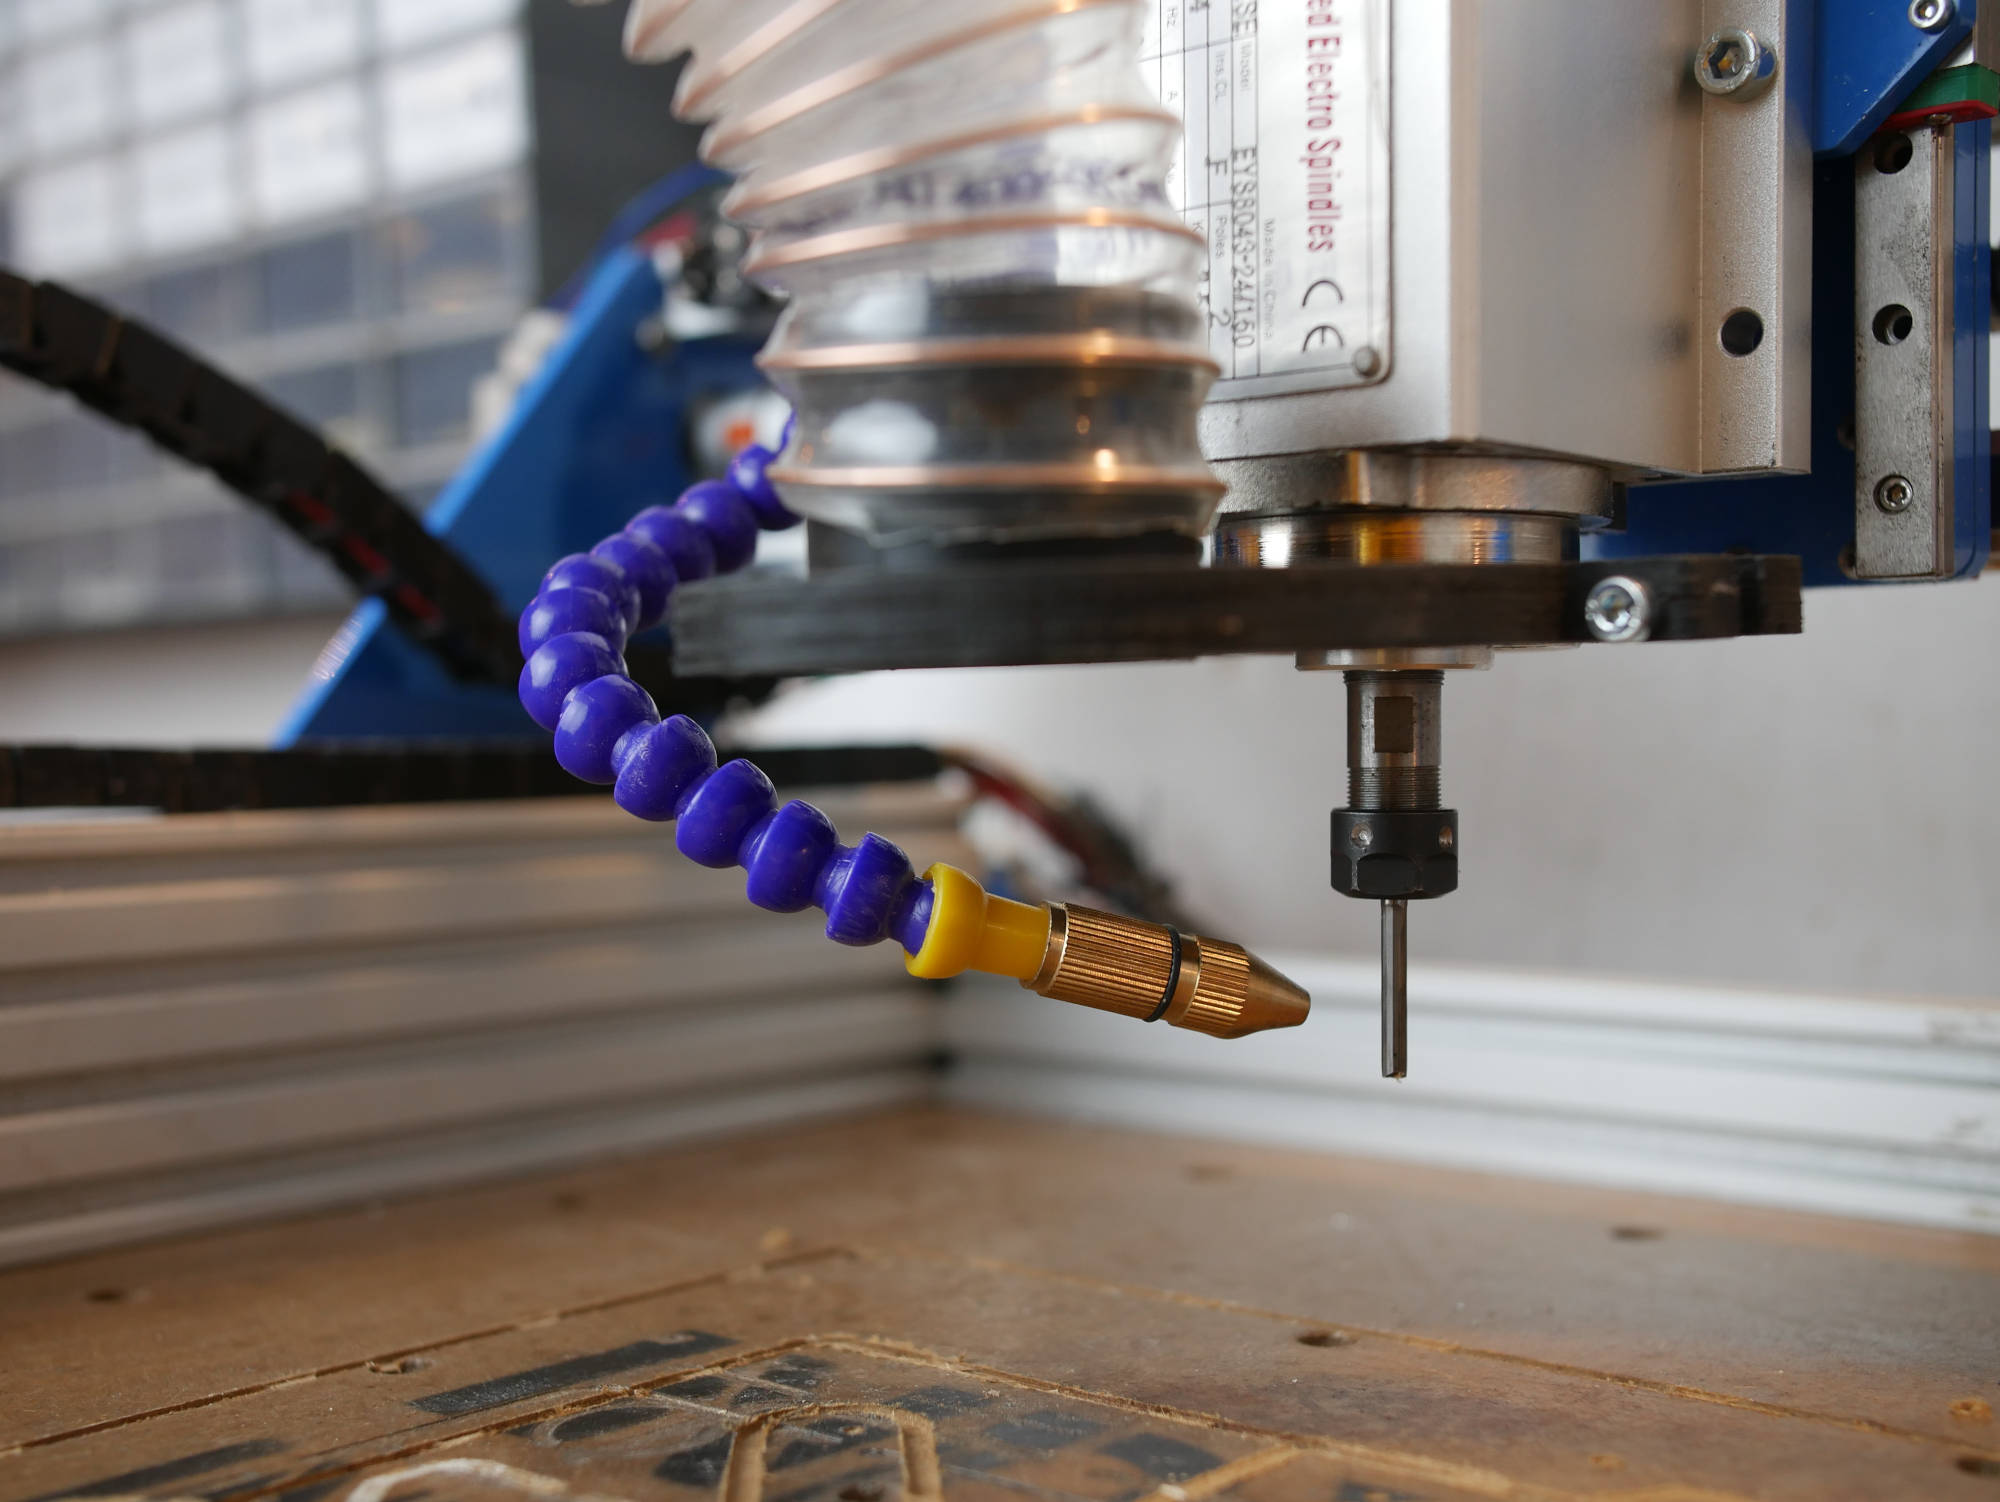
I also added some smaller (but still cool!) upgrades like a computer table, and a coolant system, and finally redesigned 3D printed files (new files are updated in the files section and on GitHub as well). You can see all of the upgrades and some other info in the following video on my YouTube channel:
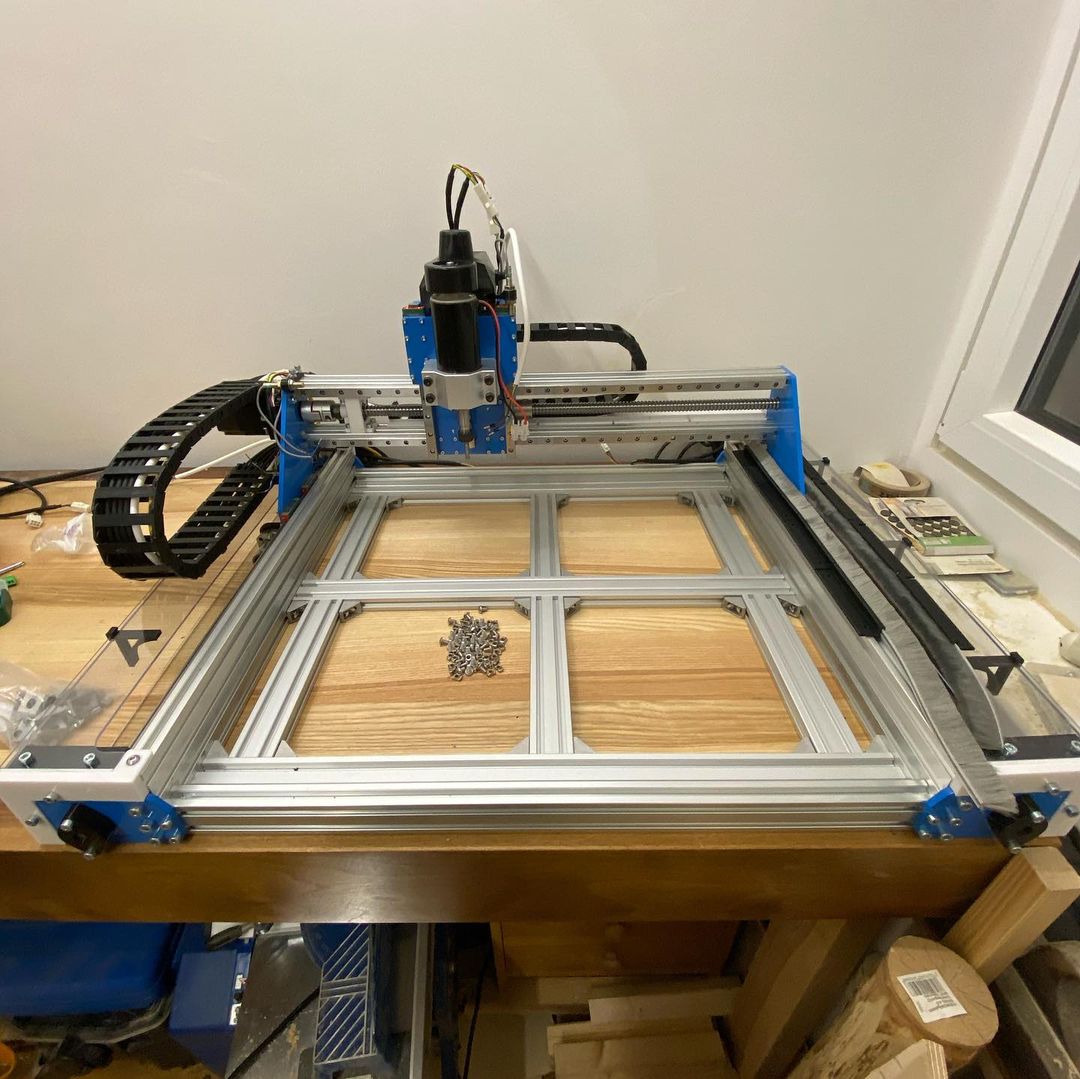
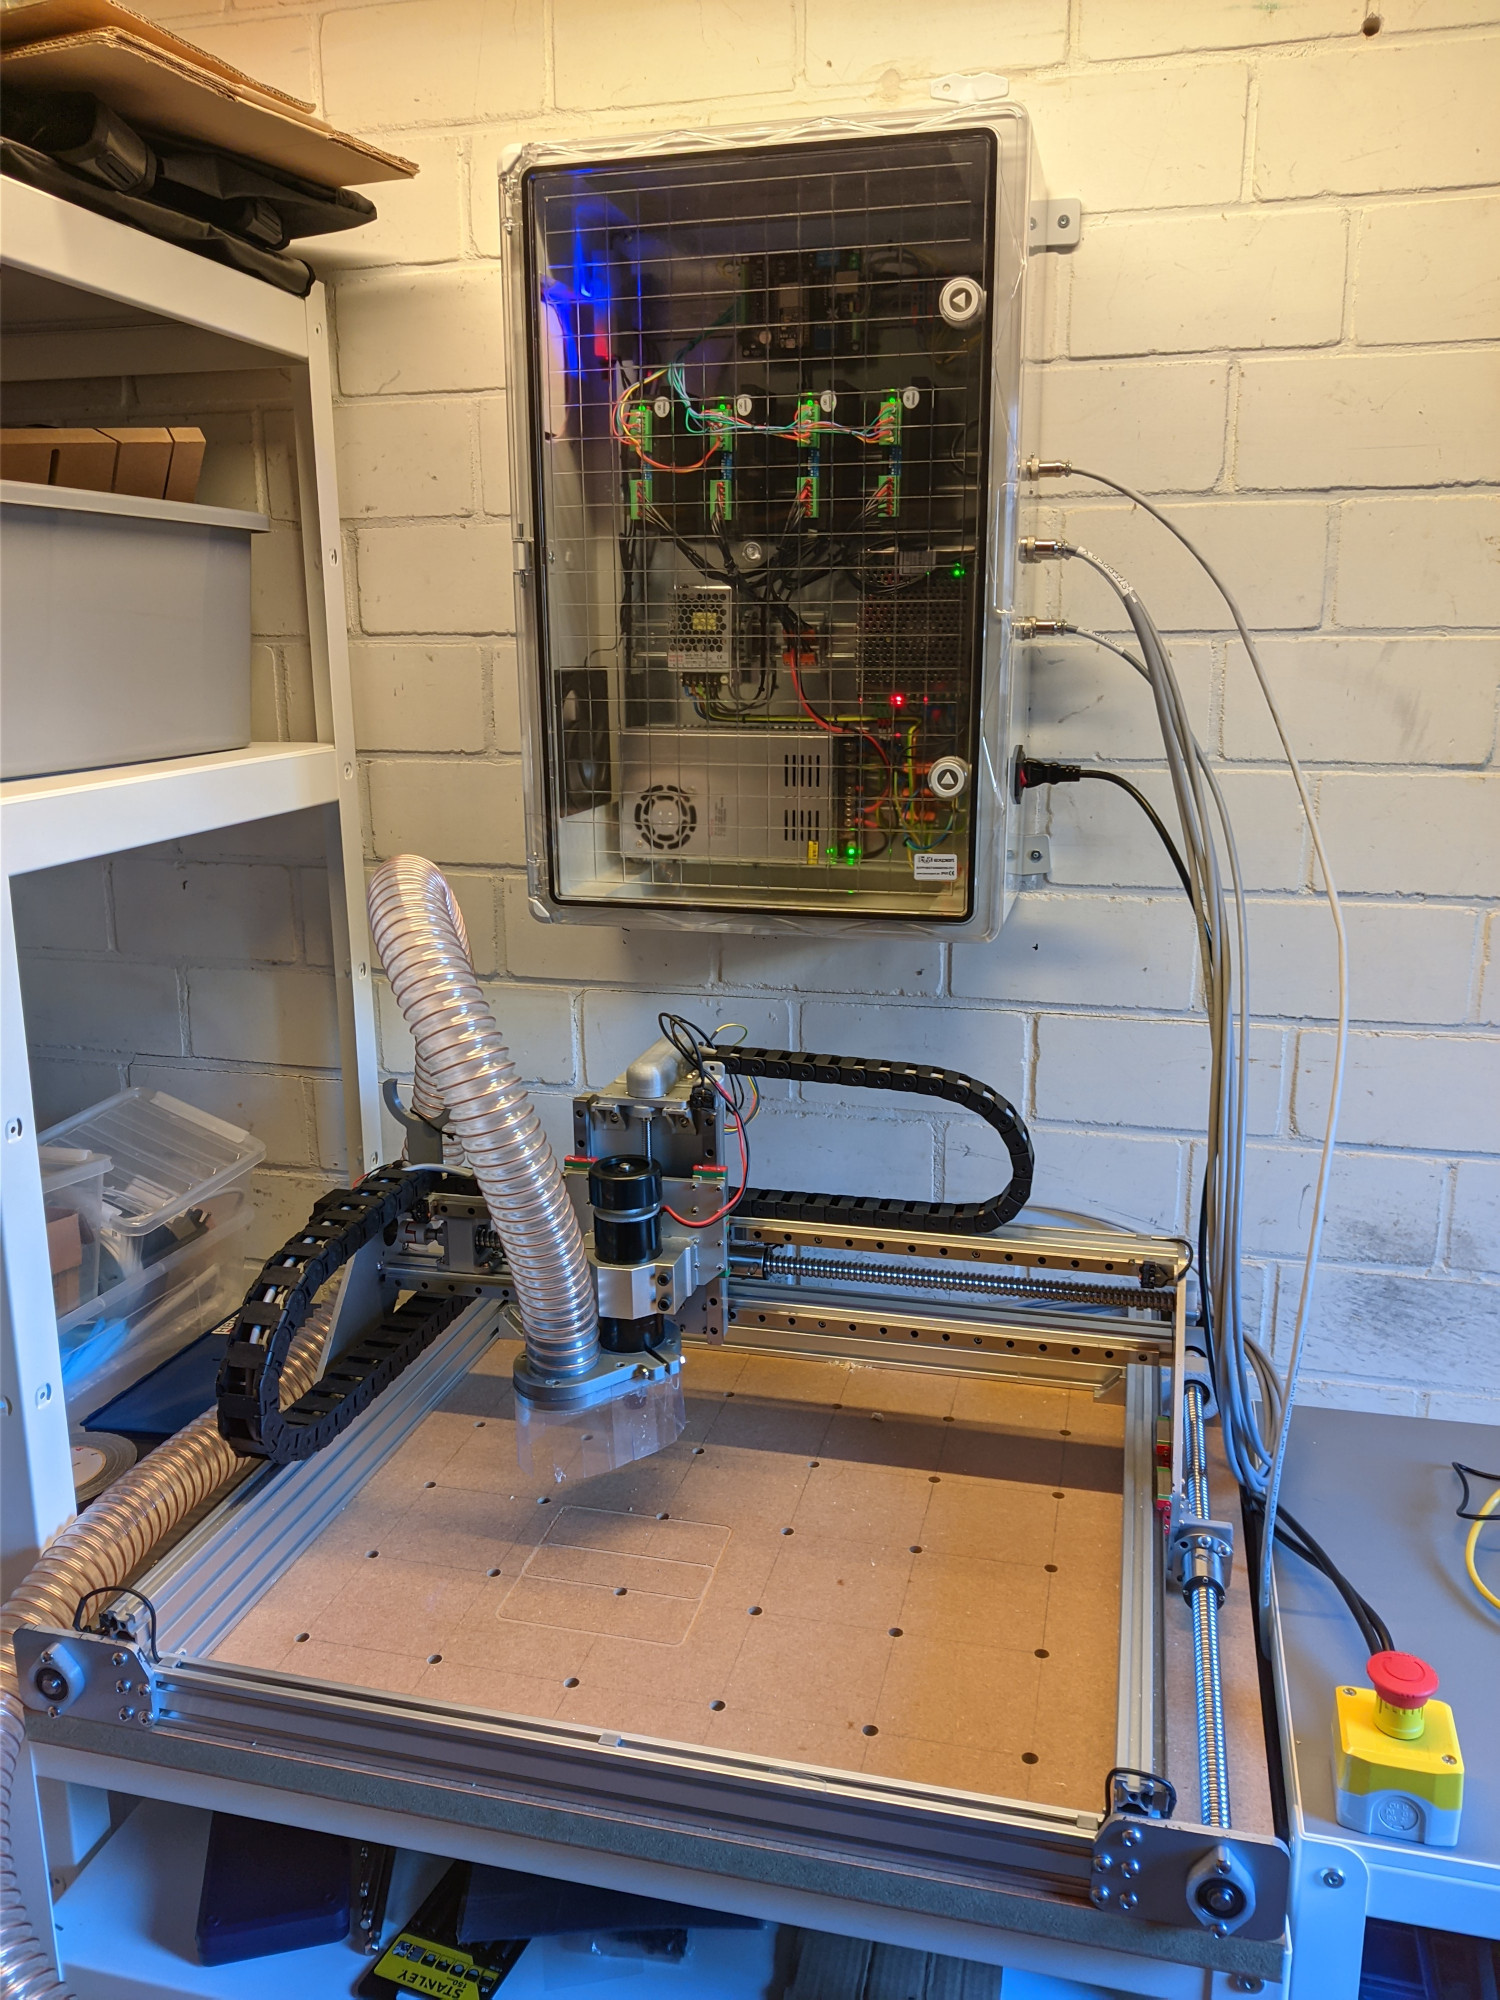
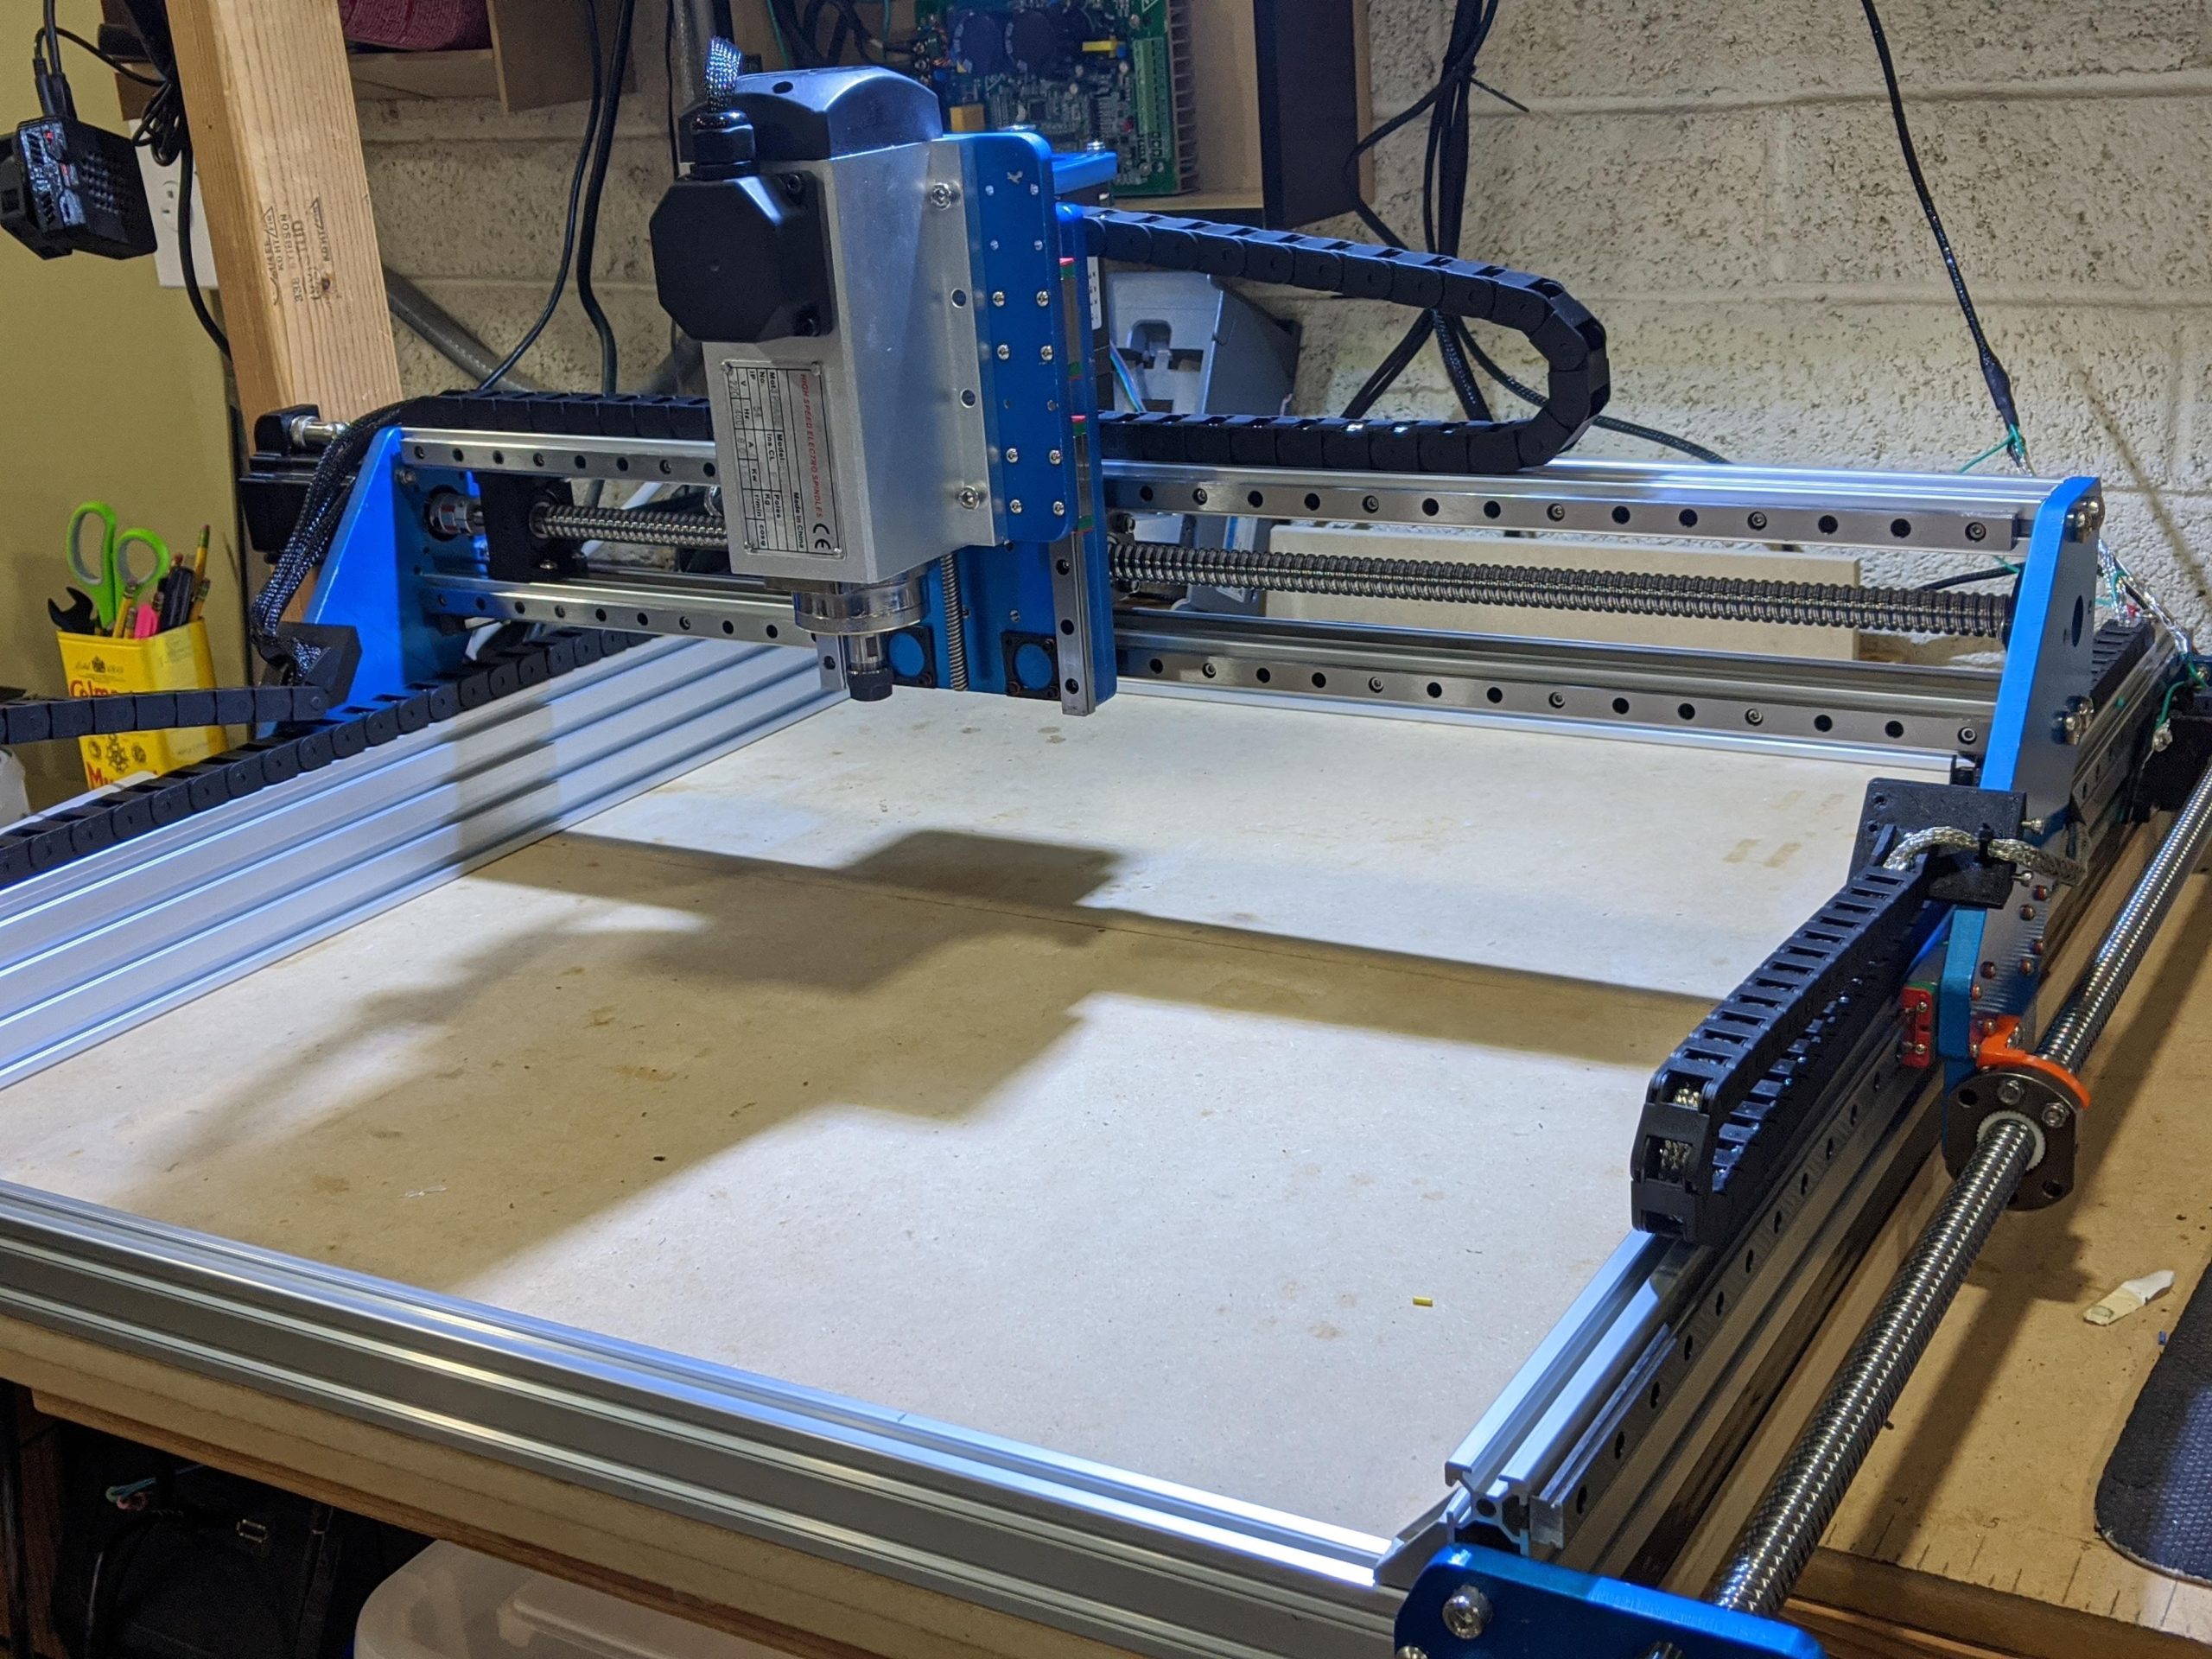
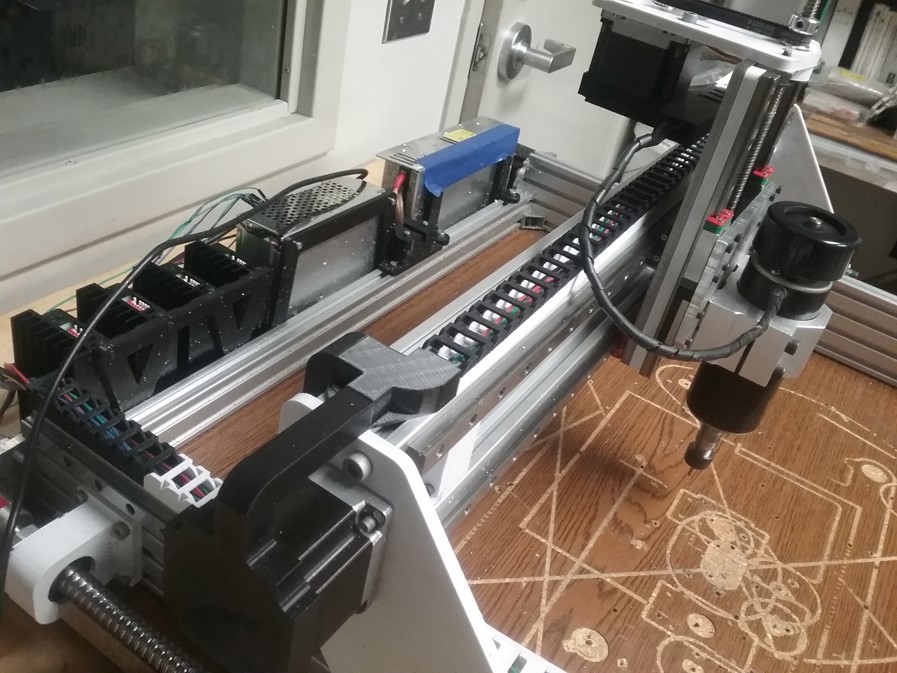
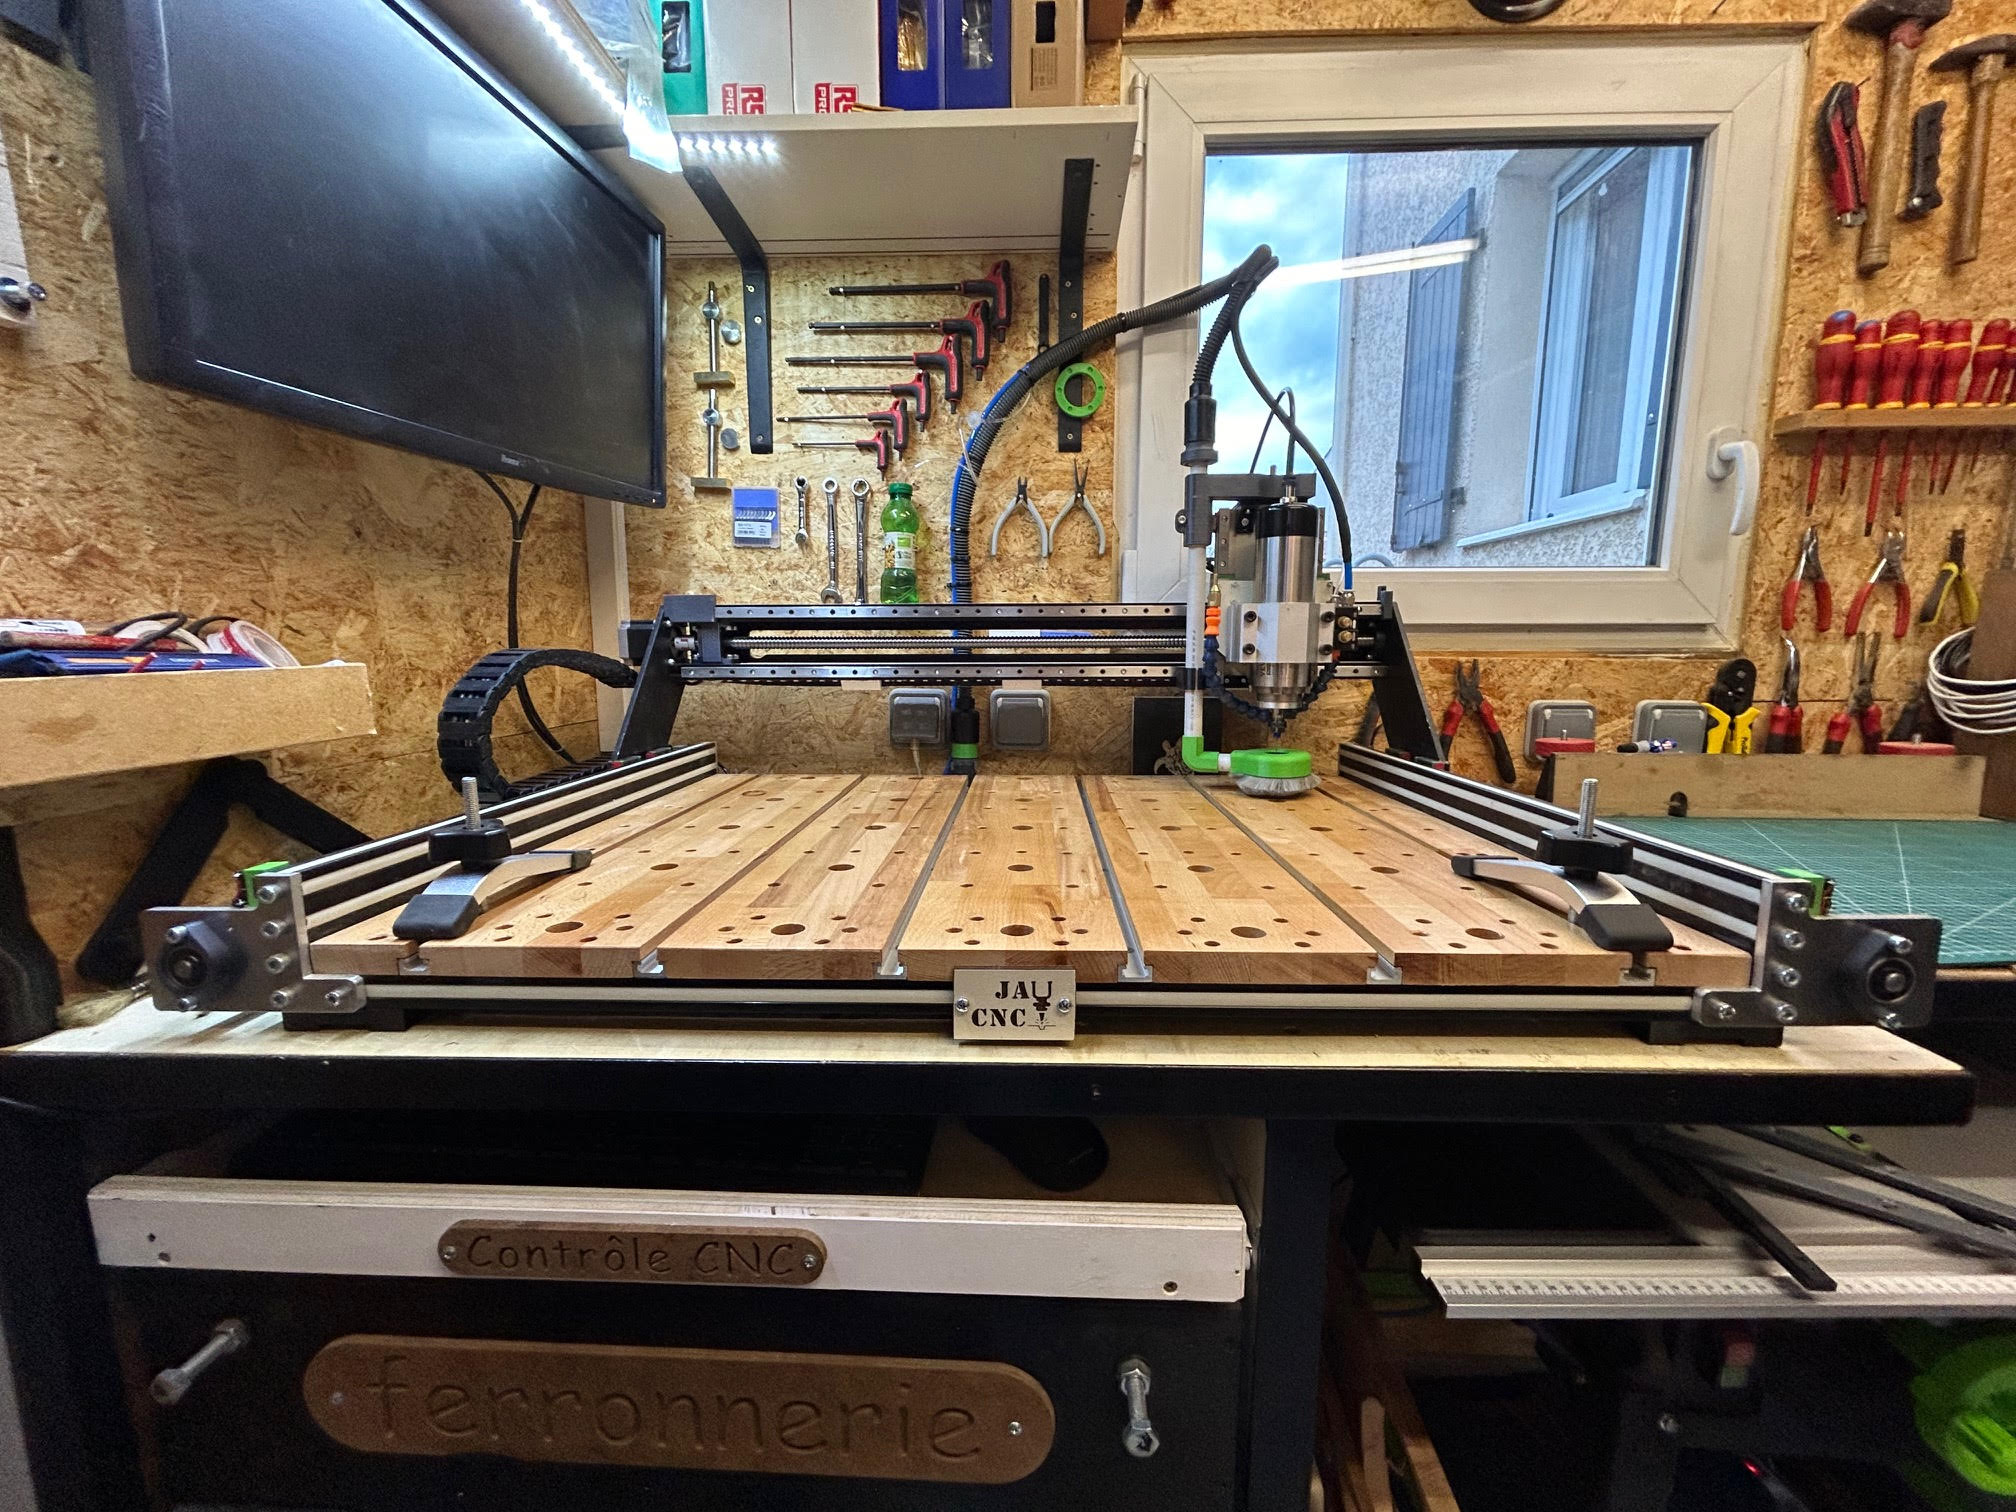
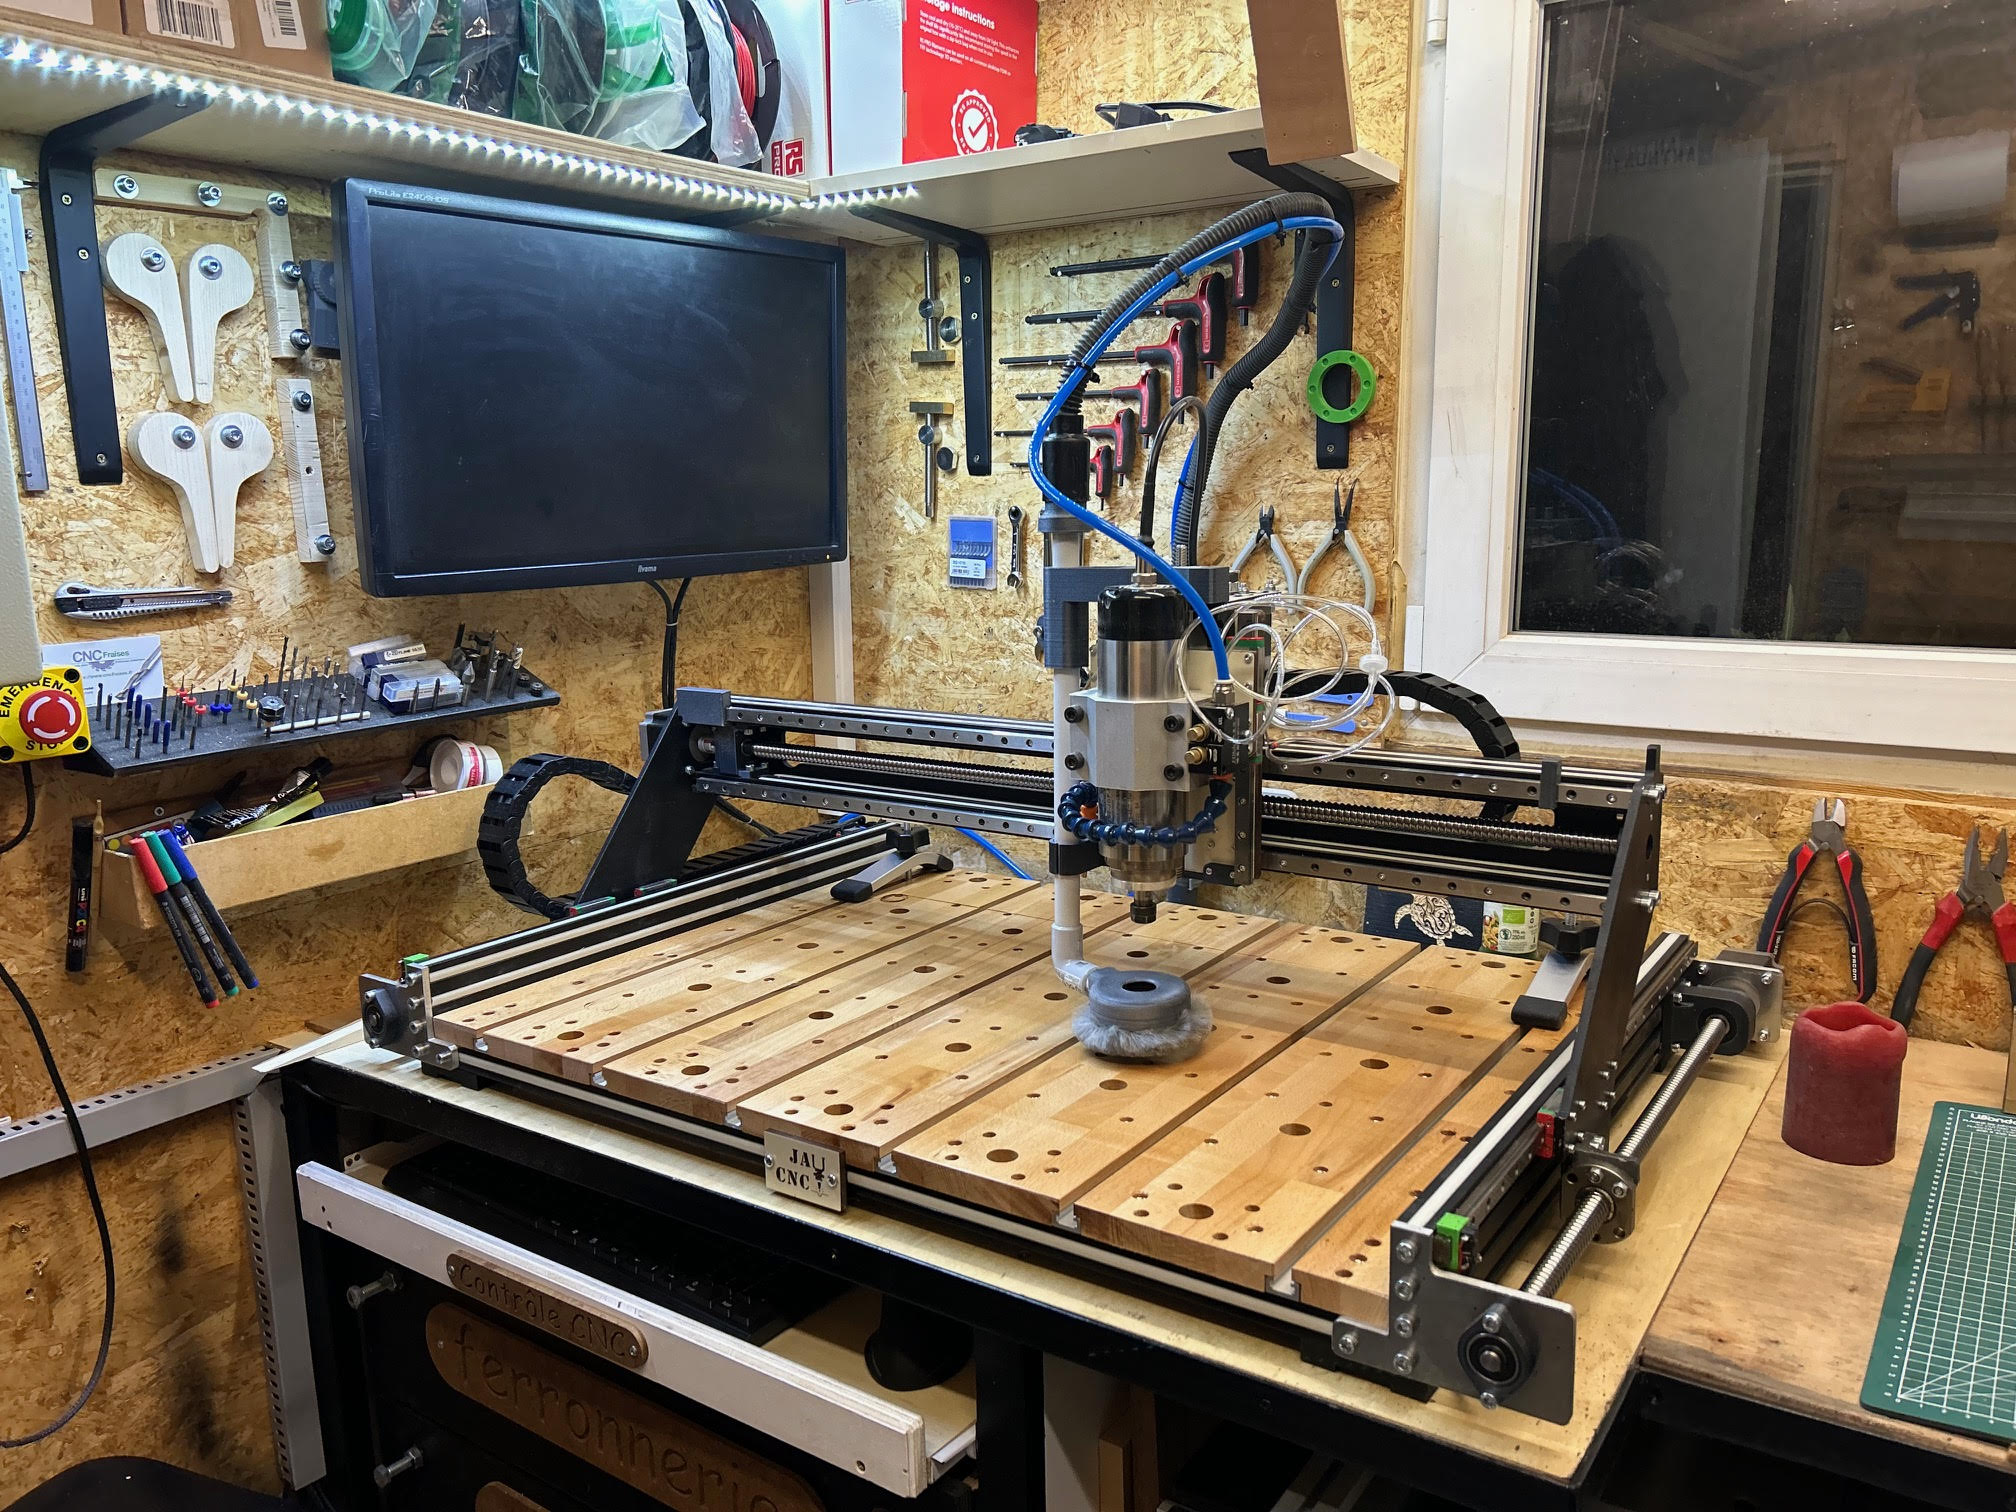
Gallery of open-source DIY CNC machine – IndyMill
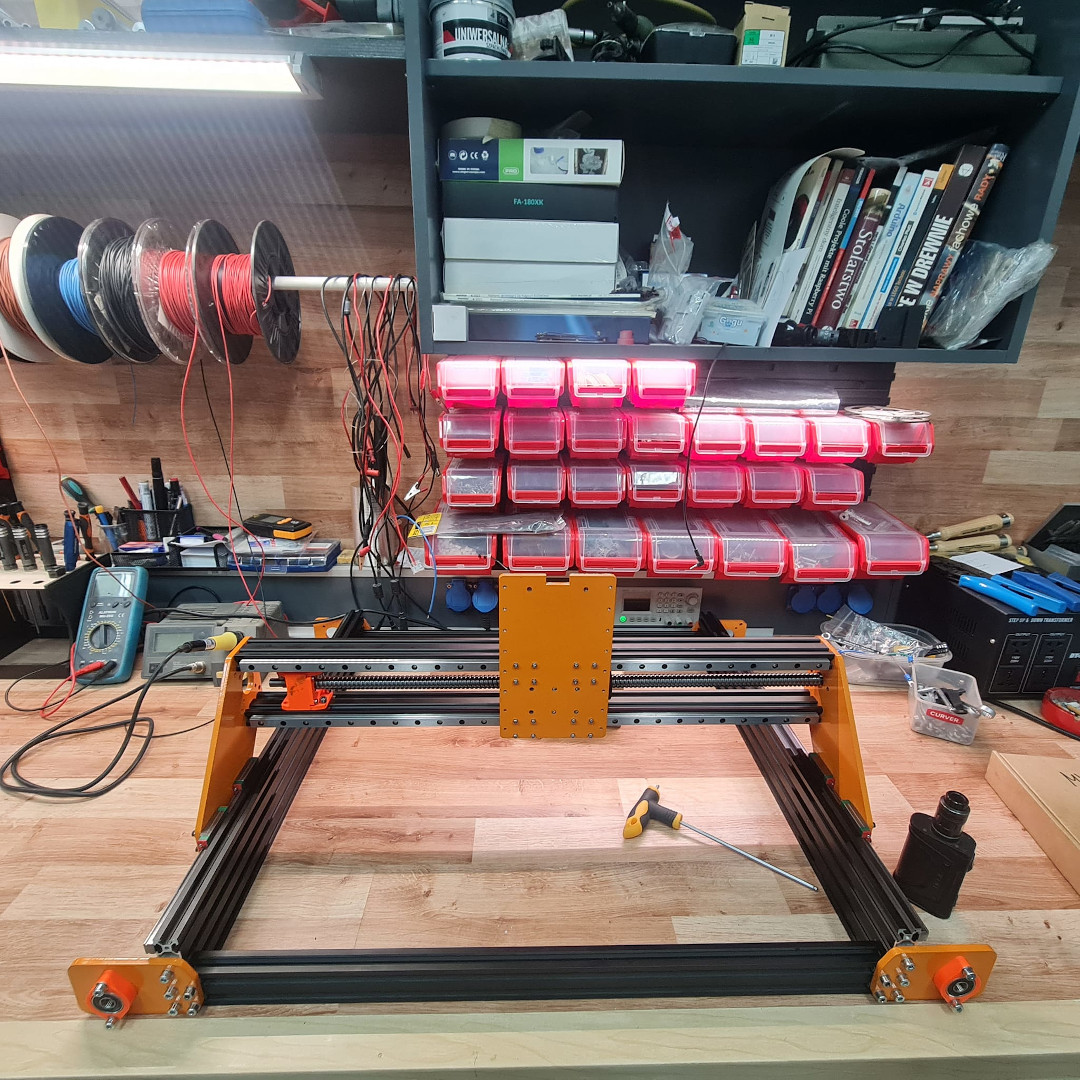
Here you can find some more pictures of my machine and the current setup.


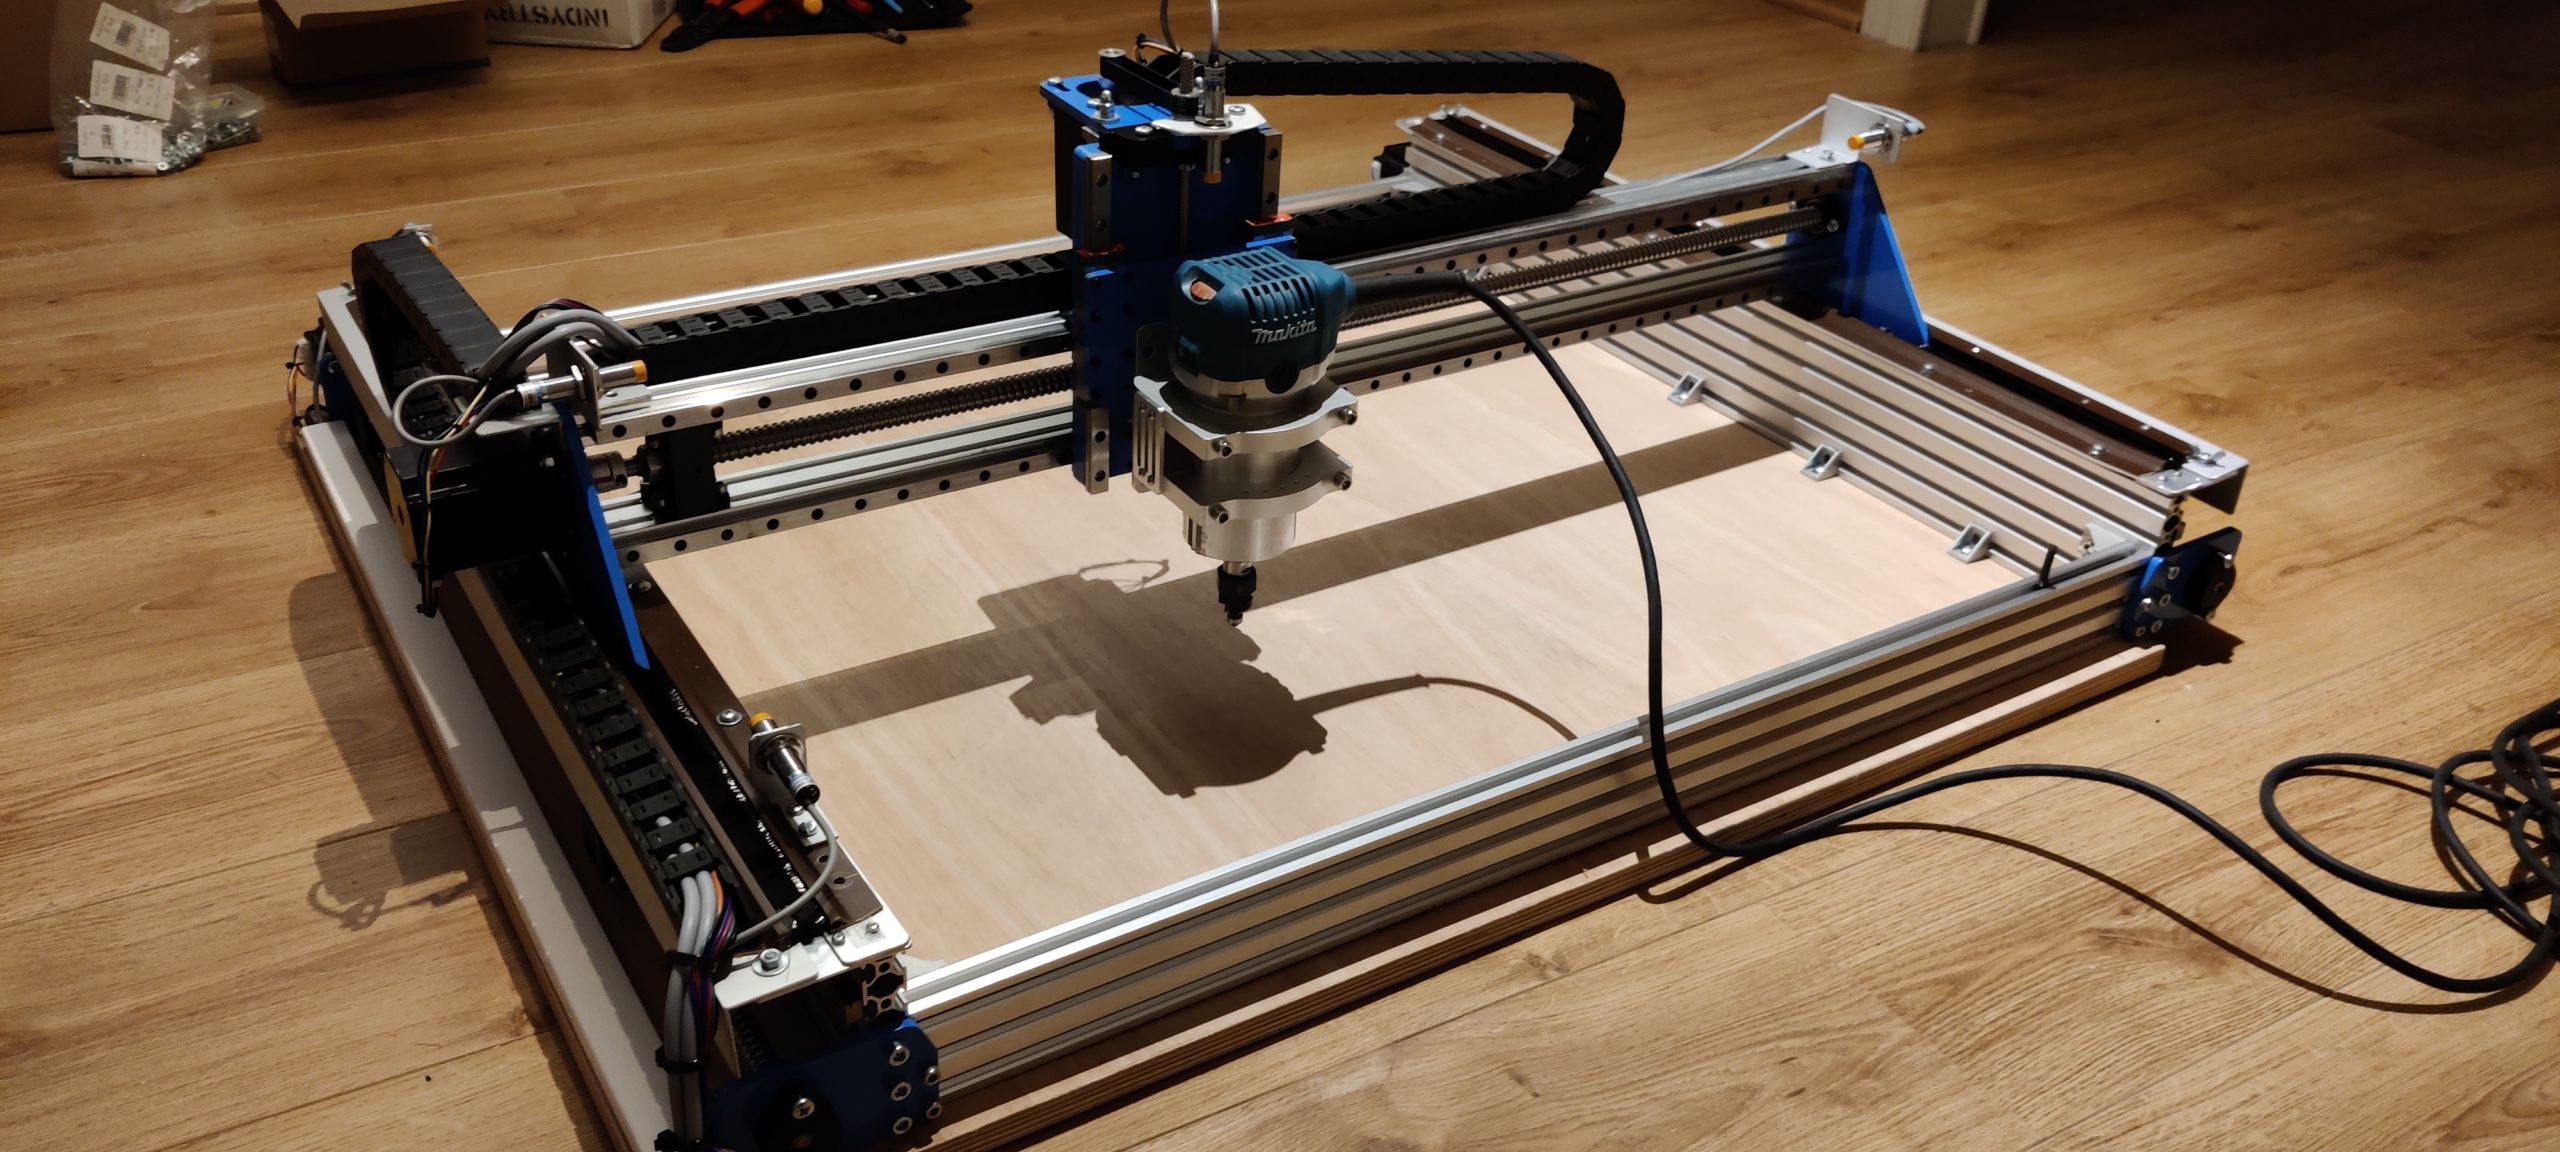
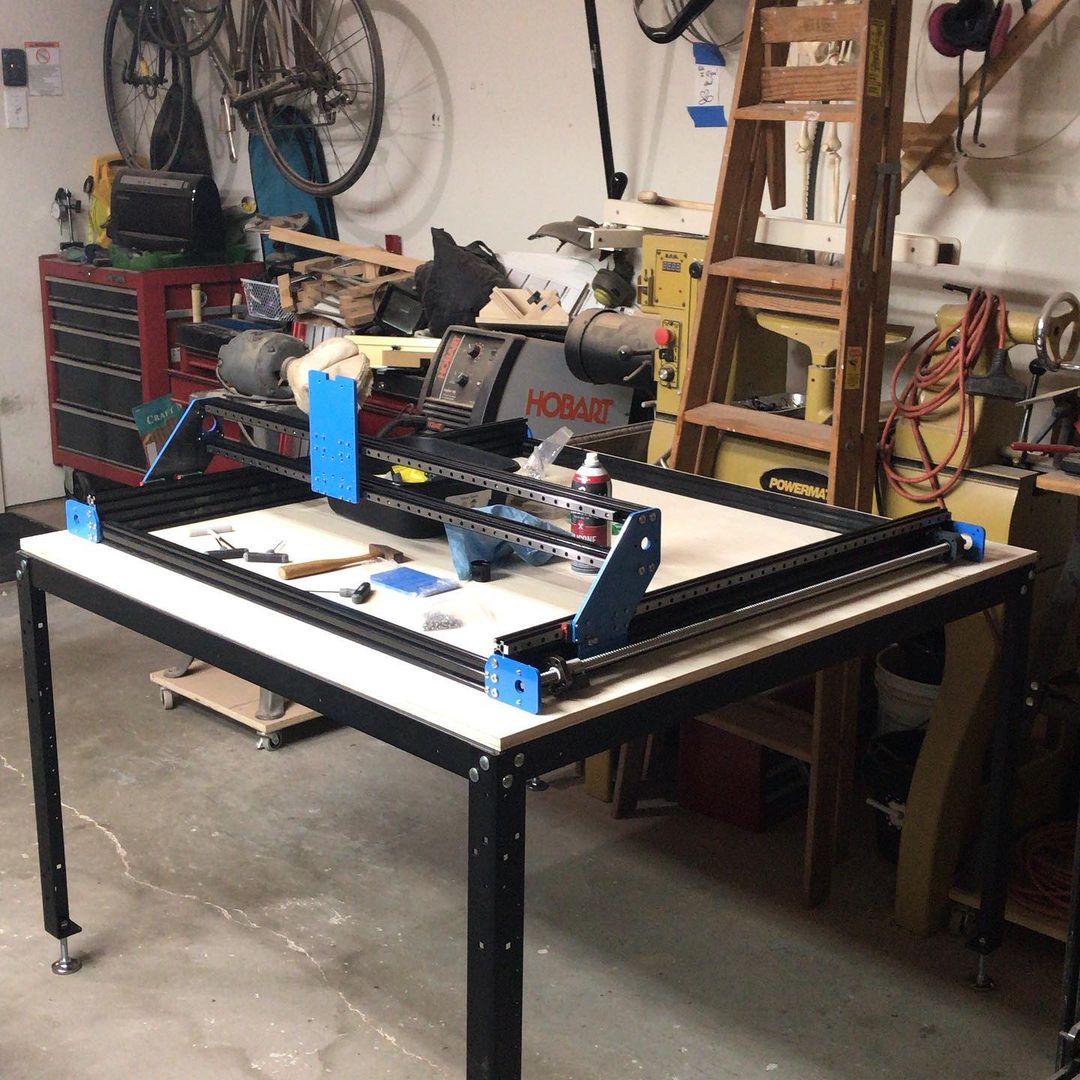
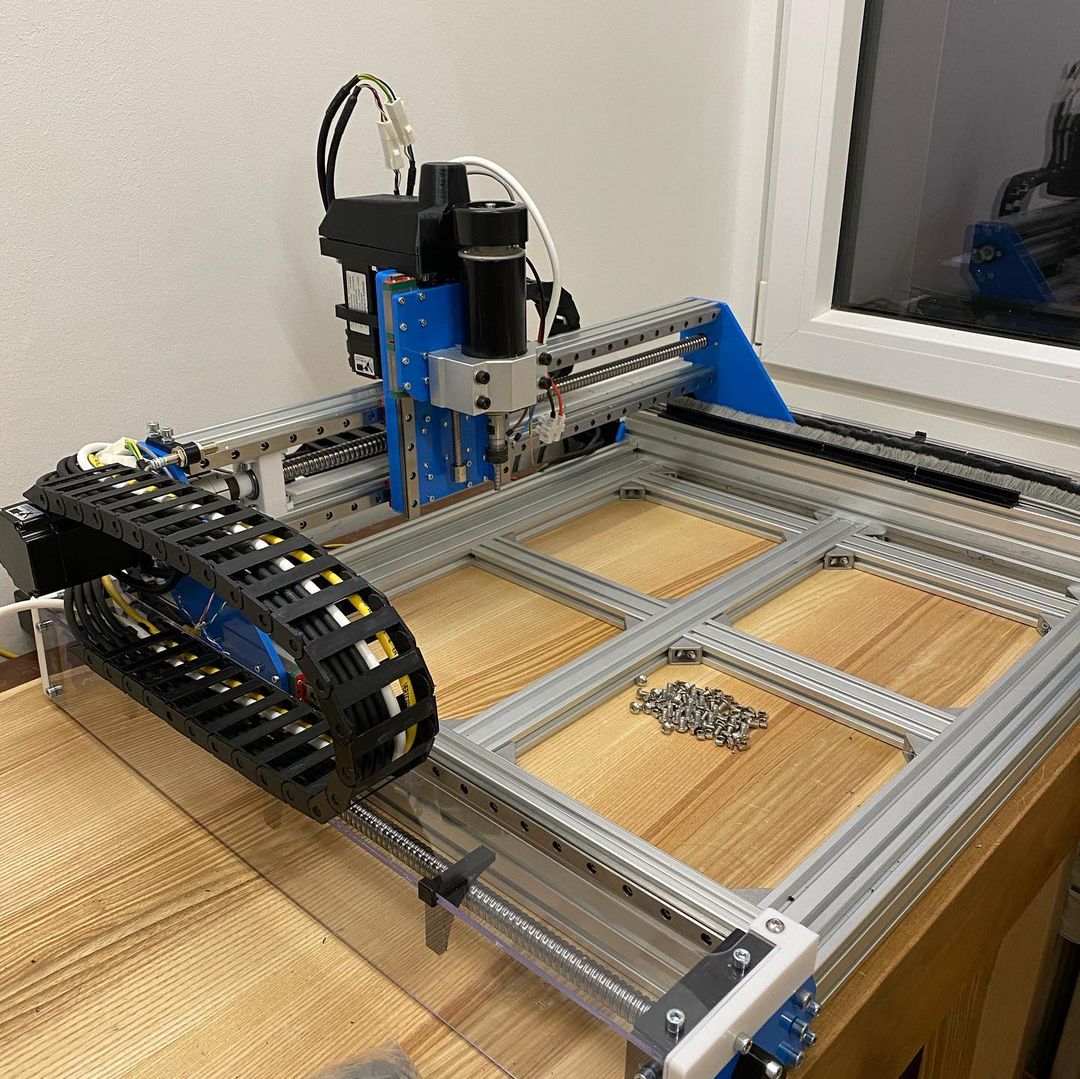
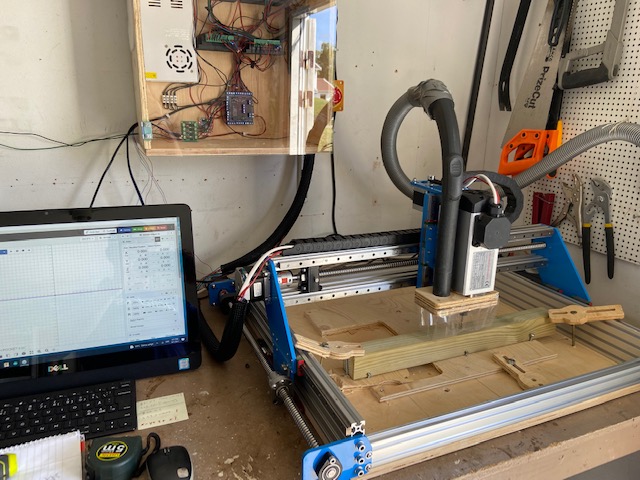
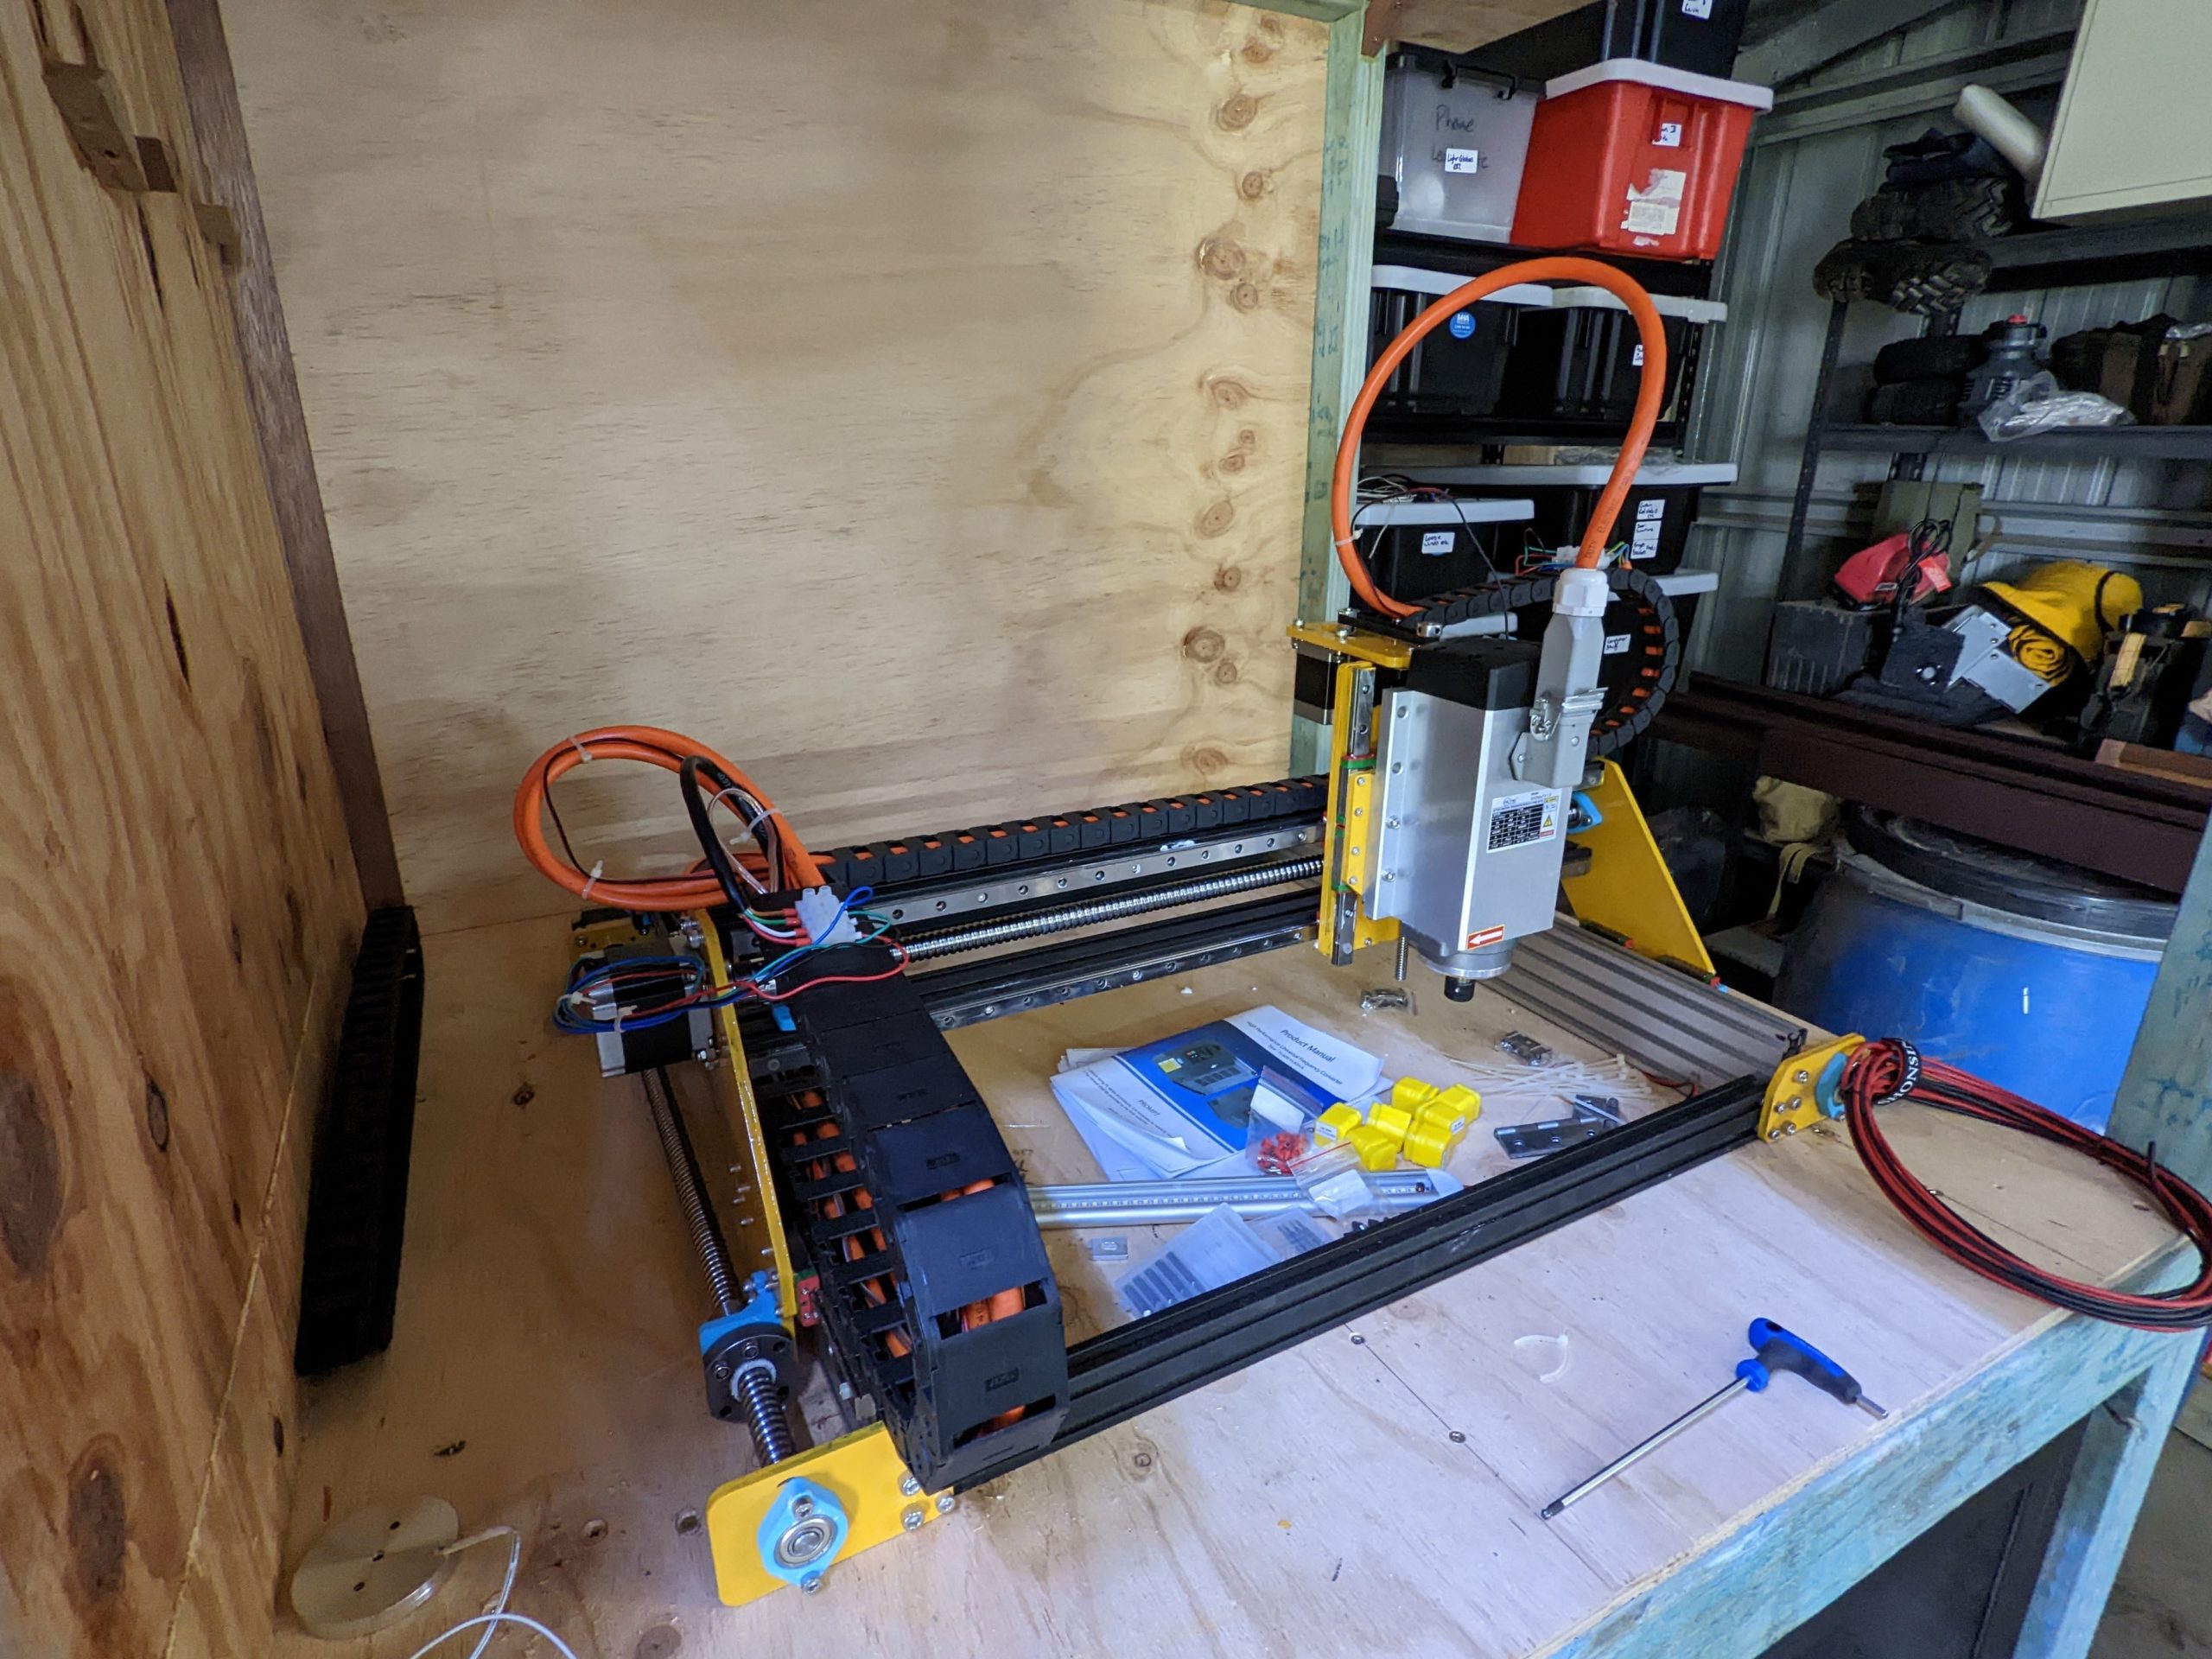
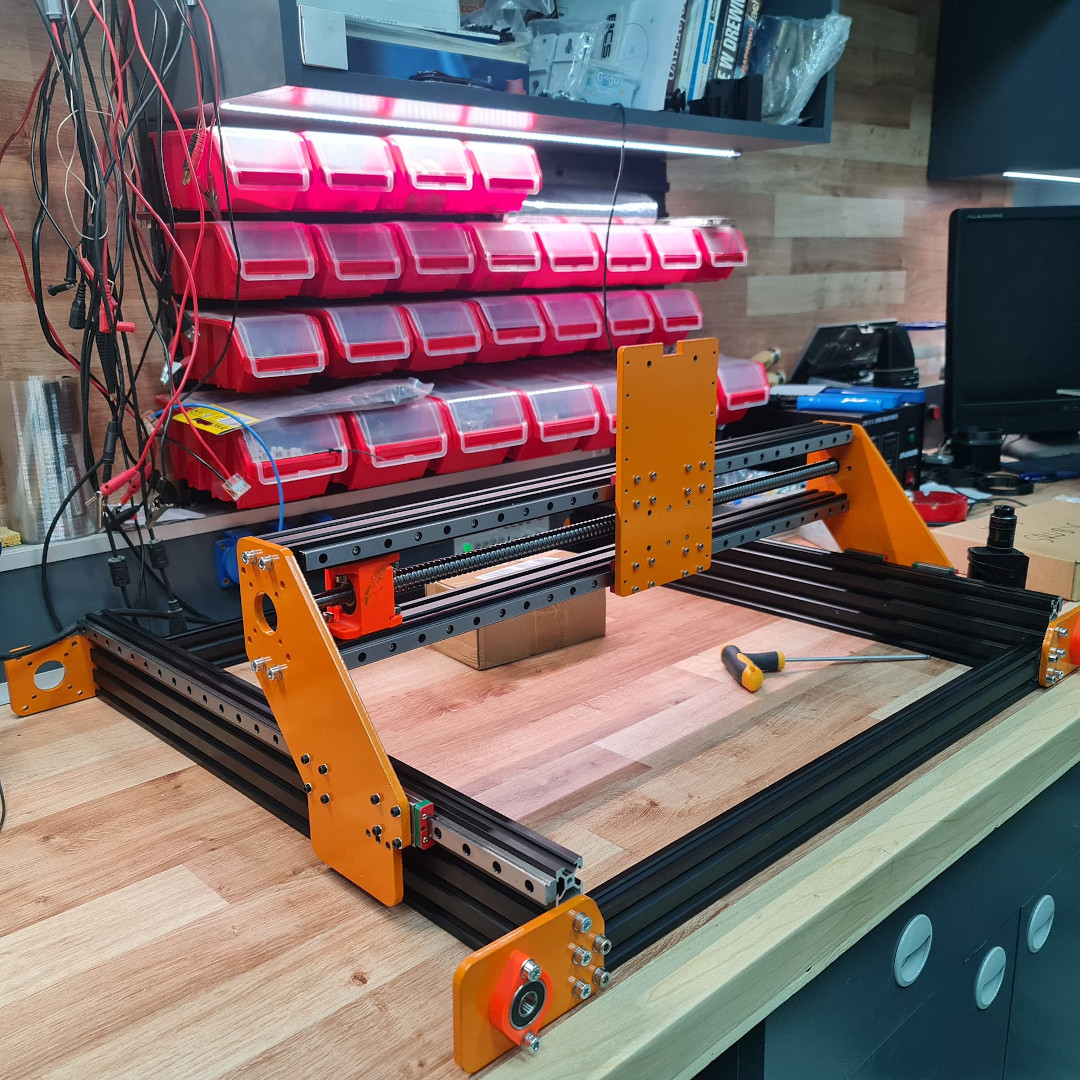
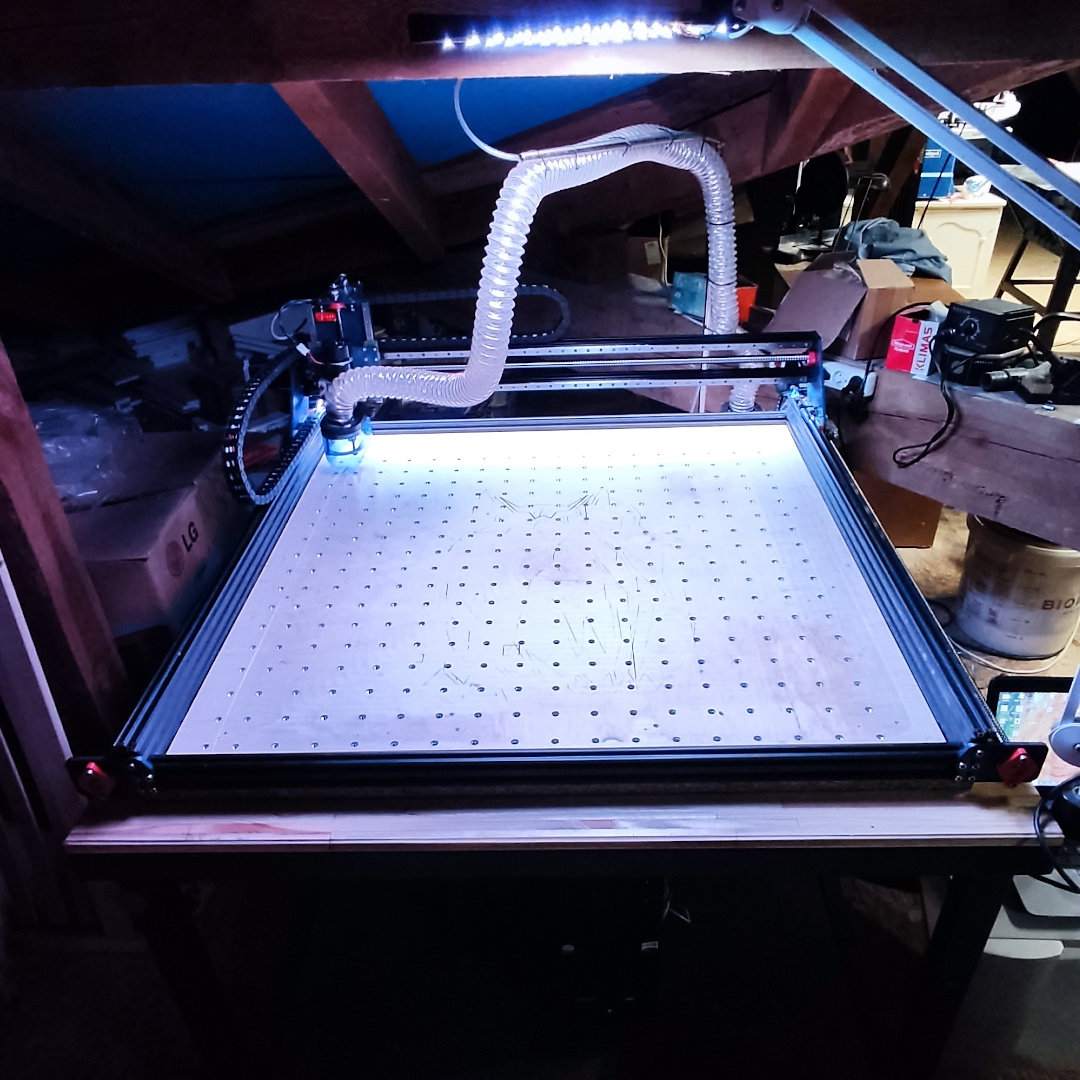
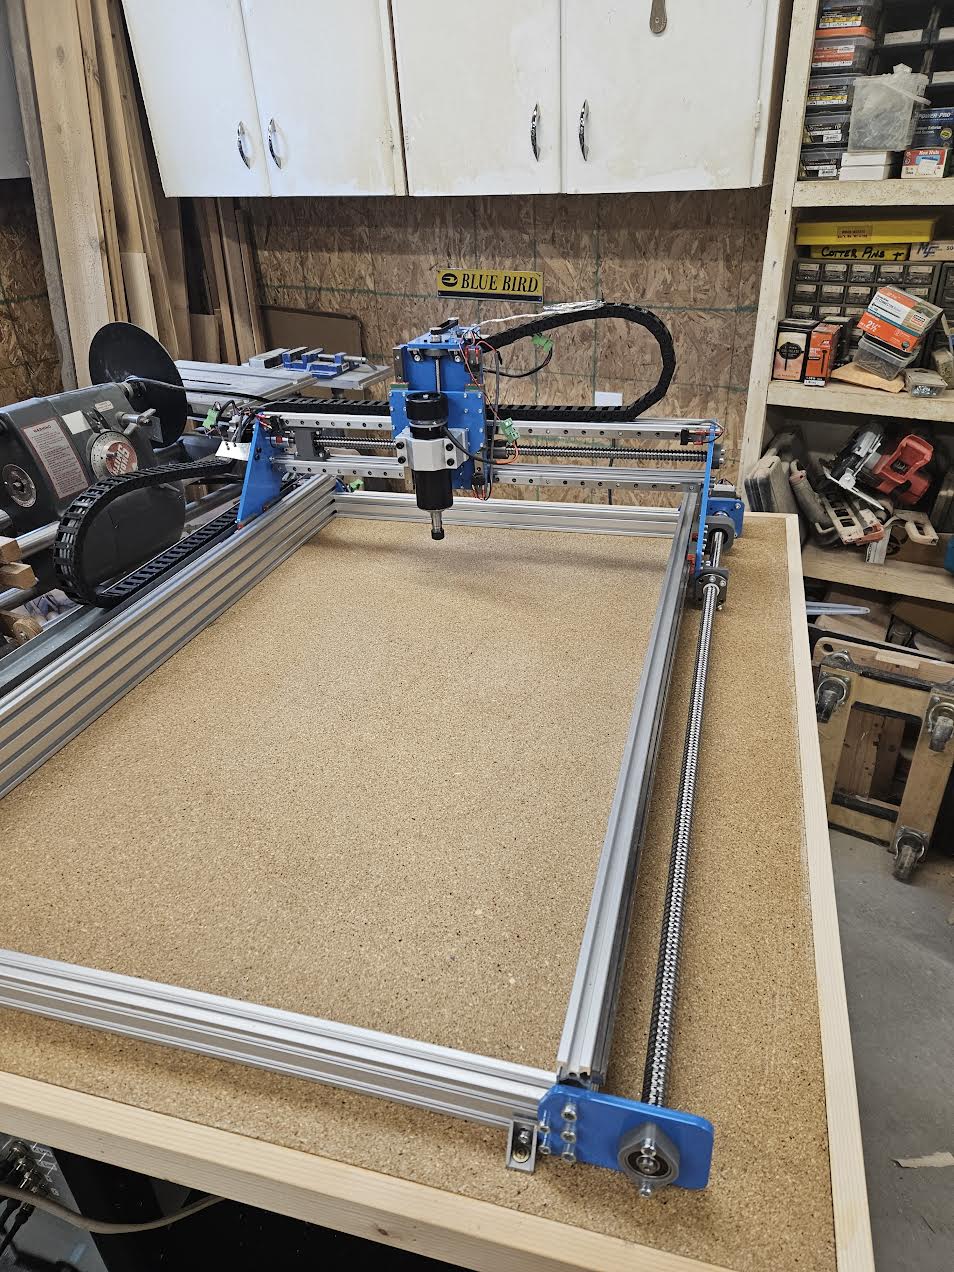
DIY CNC IndyMill Built by the community
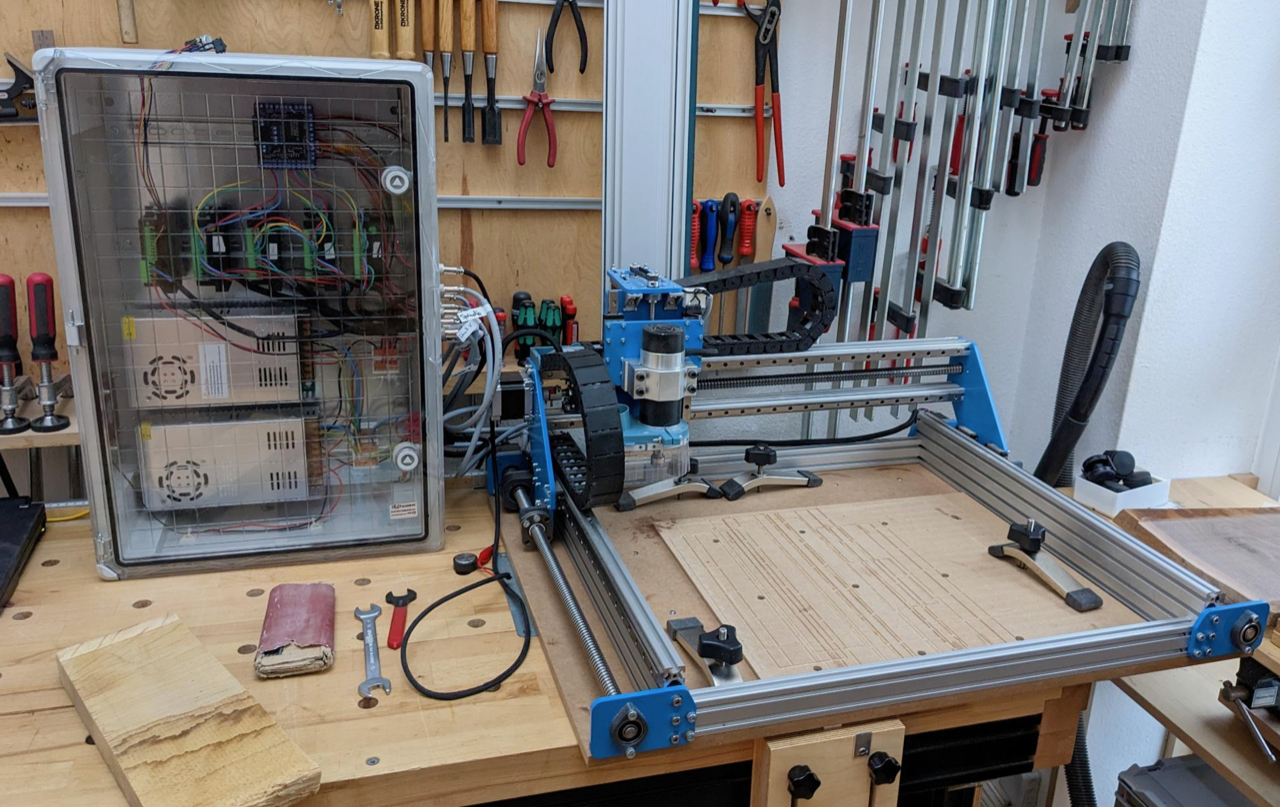
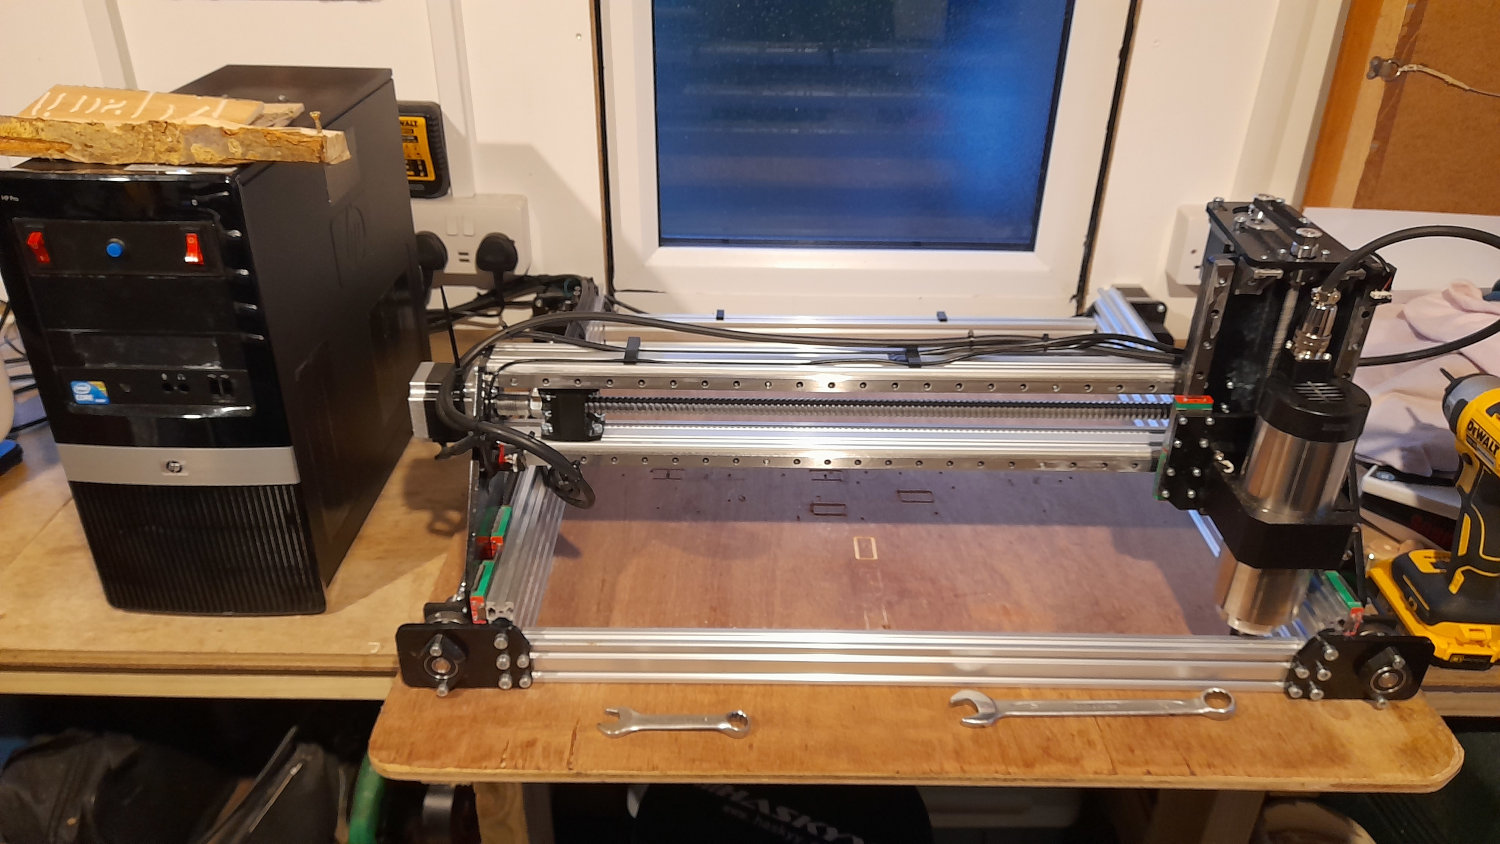
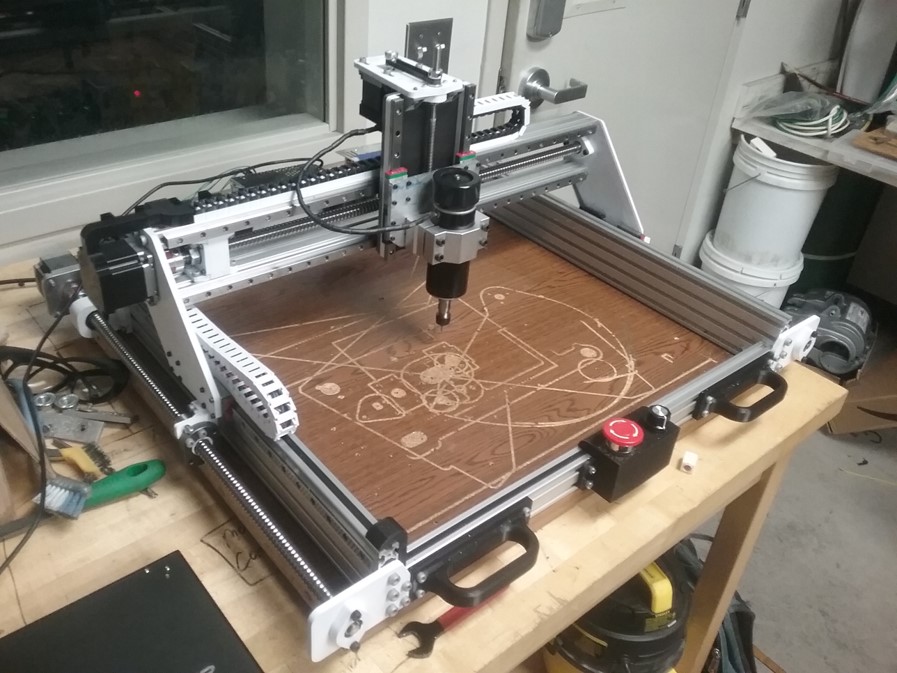
Below you can find pictures of IndyMills built by an awesome community of DIY enthusiasts, machinists, and makers! There are a lot of great examples of modified dimensions – both smaller and bigger than my original design. There are great updates to the machine frame, dust collection systems, and some very good electronics setups. Some people even build the enclosure! If you would like your machine to be featured right here send me some pictures of your CNC: nikodem@indystry.cc


IndyMill Created by Nikodem Bartnik in 2019/2020
Updated in 2025